
Have you ever felt so excited to pour out your muffin batter, only to find out that you're completely out of muffin liners? Don't fret! All you need is a roll of parchment paper, a few common household items, and 10 minutes (or less) to make your own!

Save This Recipe! 💌
Jump to:
This happened to me once when I was making my almond poppy seed muffins. I was practically digging into my cabinet like it was Black Friday, looking for that box of muffin liners I thought I had!
Eventually I realized it was a lost cause, so I found my roll of parchment paper and got to work DIY-ing these muffin liners. Within 20 minutes (plus some researching), I was back on track. Luckily, my easy muffin recipes are okay sitting out for that time!
DIY parchment paper muffin liners are a baking trick that any baker should have up their sleeves. You can use them whether you're making muffins for breakfast or cupcakes for dessert!
In this article, I'll guide you through my step-by-step process of making tulip-shaped muffin liners without a ruler. Of course, there are some benefits of store-bought, ready-made muffin liners and we'll talk about that as well.
What You'll Need to Make Parchment Paper Muffin Liners
Now, let's get crafty! To make your own muffin liners, all you need are these materials:
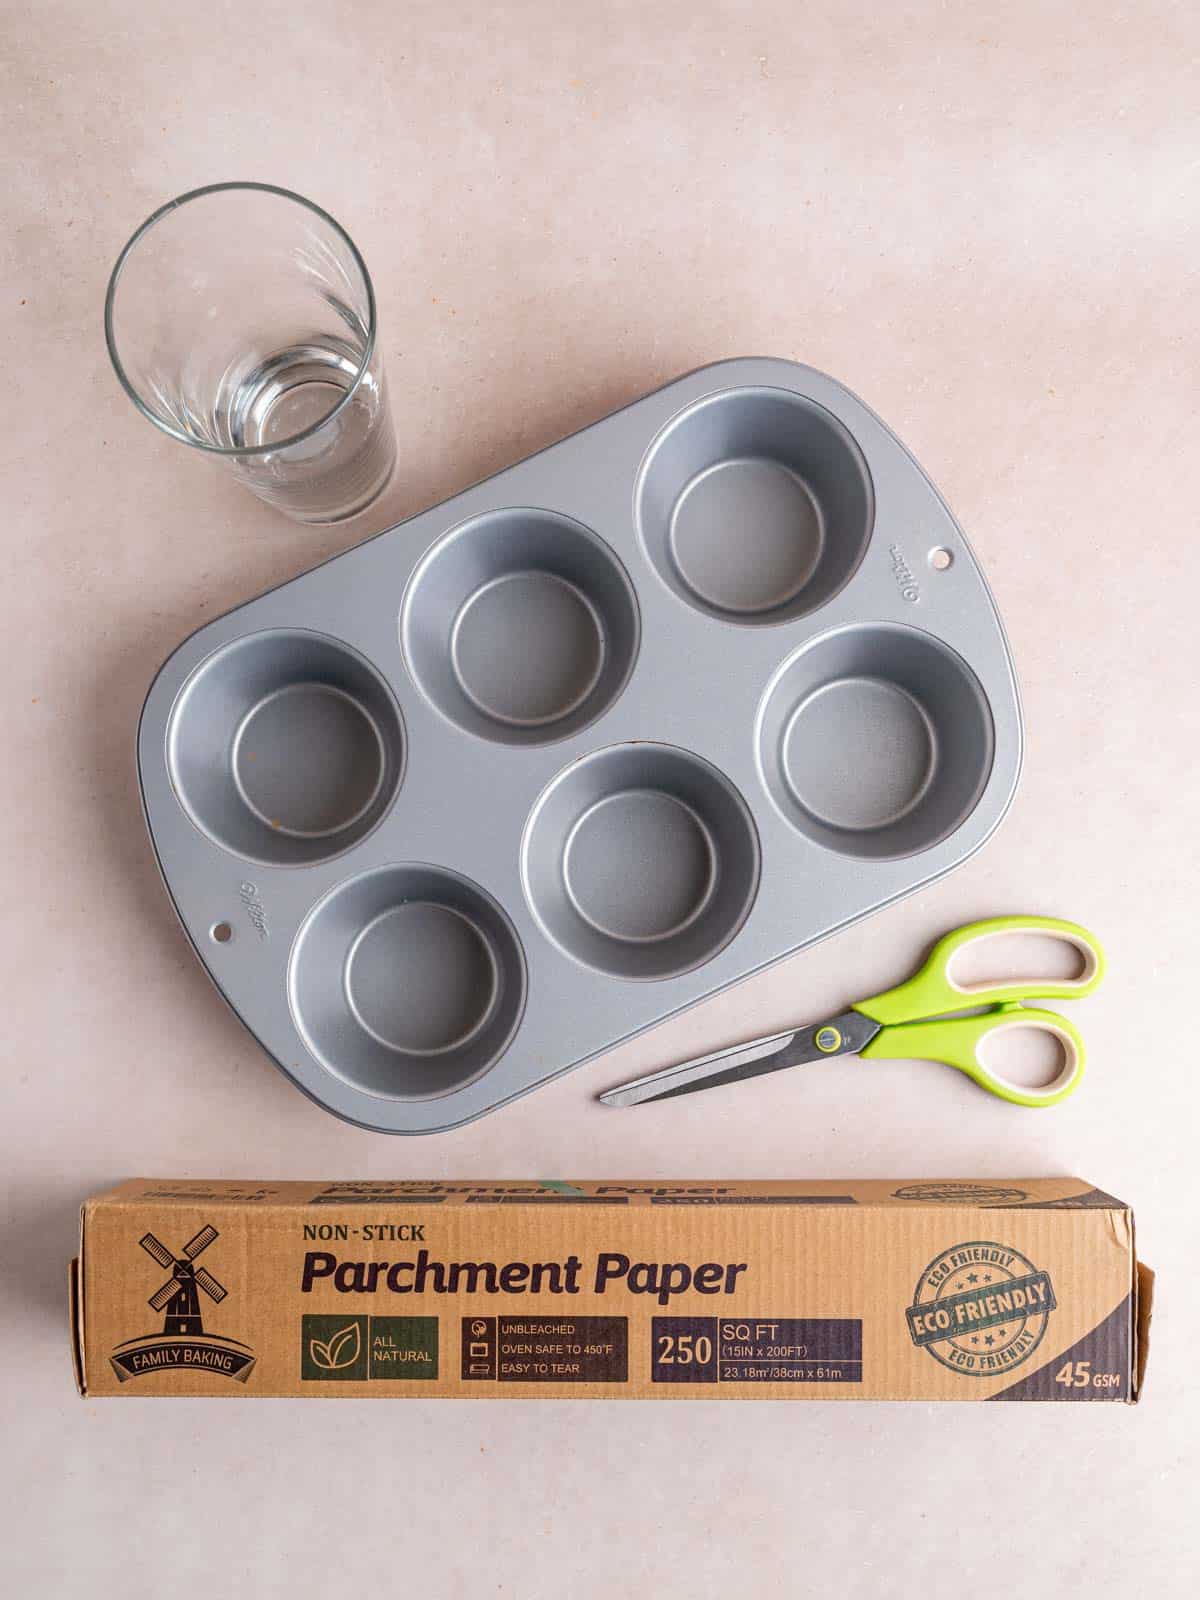
- Parchment paper - We're looking for non-stick, oven safe baking paper (you can use any color but I like natural, unbleached ones).
- Scissors - Make sure these are sharp scissors meant for paper.
- Muffin pan - For this project, I've used a 6-cup jumbo muffin pan.
- A clean glass - The base of the glass should fit inside your muffin pan's wells. You can also use a food can, as long as it's the right size.
The muffin liners will be coming in direct contact with your bakes, so please ensure all of your equipment is clean and sanitary. Rulers and pencils are optional.
There are no strict numbers or measurements you need to follow to make these. This is because every home uses different muffin pans and this also depends on the size of muffins you want to make that day. I recommend simply grabbing a glass that fits your muffin pan well.
That being said, if you do want to follow strict measurements, I'll provide general sizes in the instructions below.
Now, let's start making our muffin liners! I will be using a 6-well muffin pan that is about 1.5-inches tall.
Step-by-Step Video and Photo Instructions
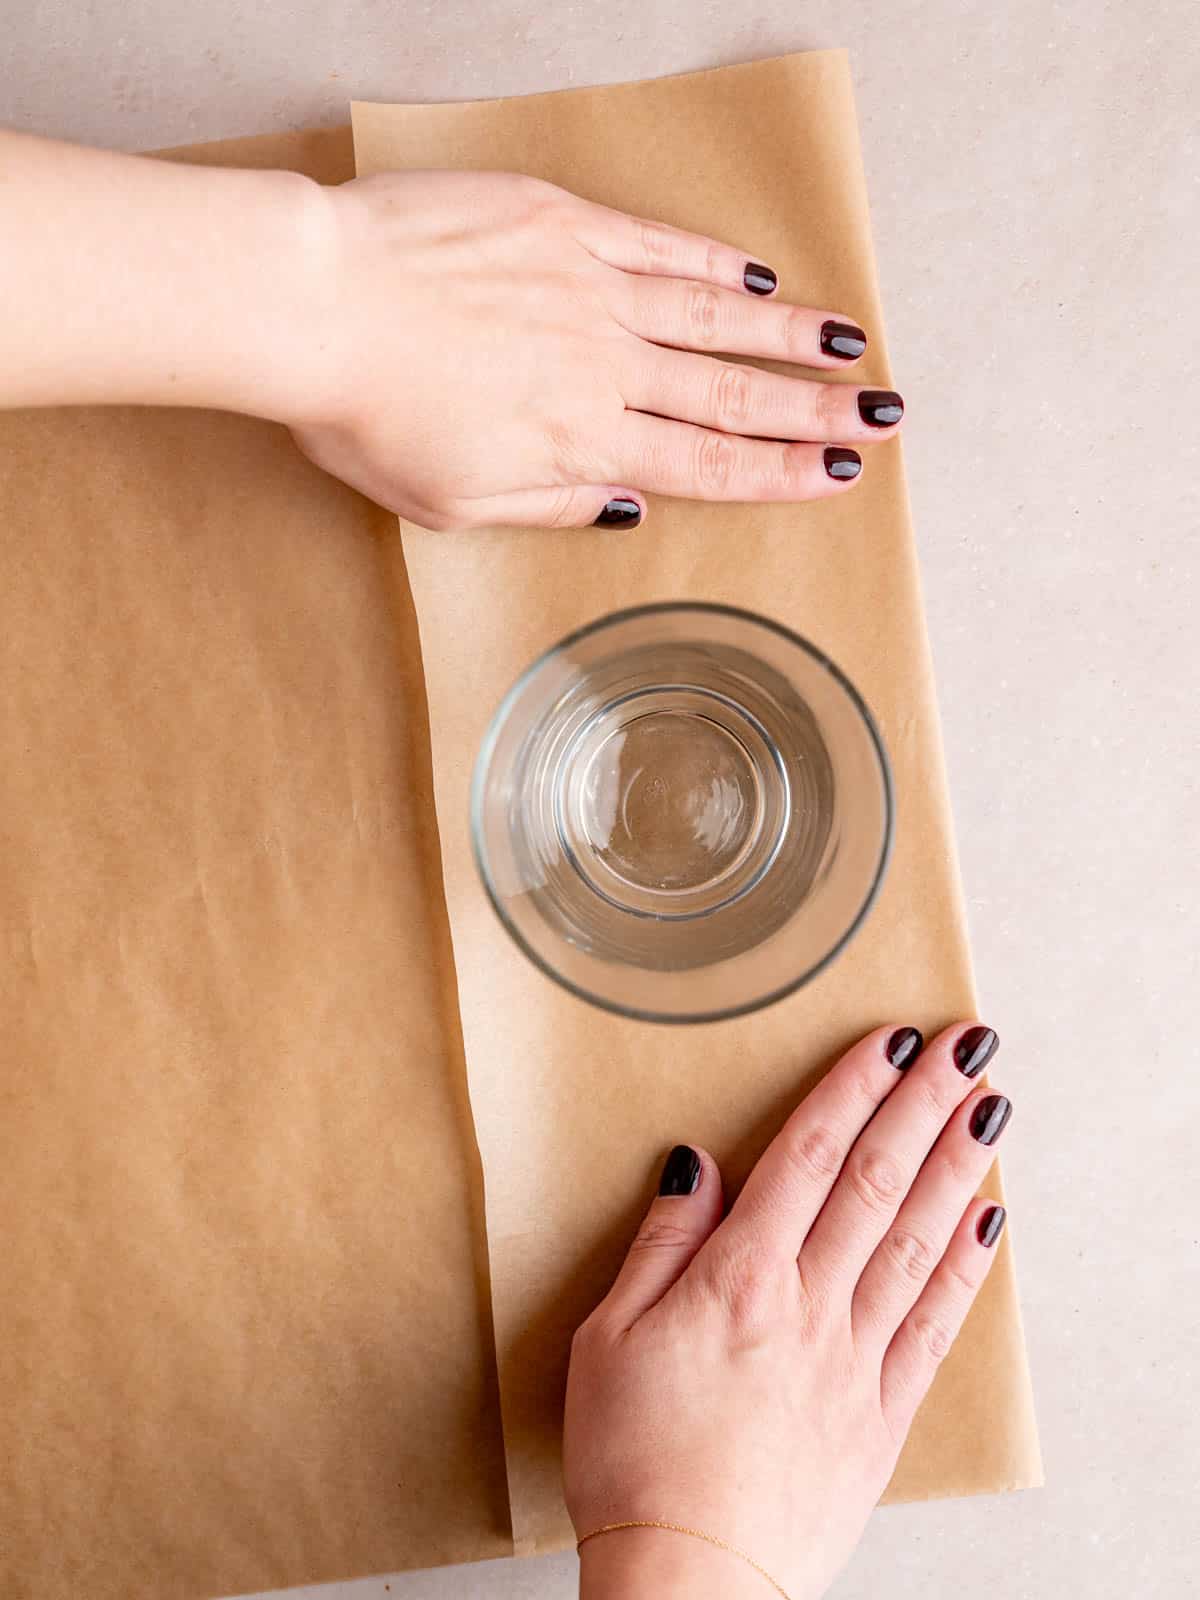
Step 1: Fold the short end of the parchment paper inwards. Place the glass on the paper, making sure there's about 1 to 2 inches around the bottom of the glass to create the walls of the muffin liners.
In this example, my fold measures about 6 inches for my jumbo muffin pan.
It's okay for your homemade muffin liners to look imperfect! However, if you want specific measurements to follow, keep these in mind...
- Jumbo muffin pan: cut 6 inch squares
- Regular muffin pan: cut 5 inch squares
- Mini muffin pan: cut 3-4 inch squares
Step 2: Cut the bottom layer of the parchment paper and you should get a hot dog fold.
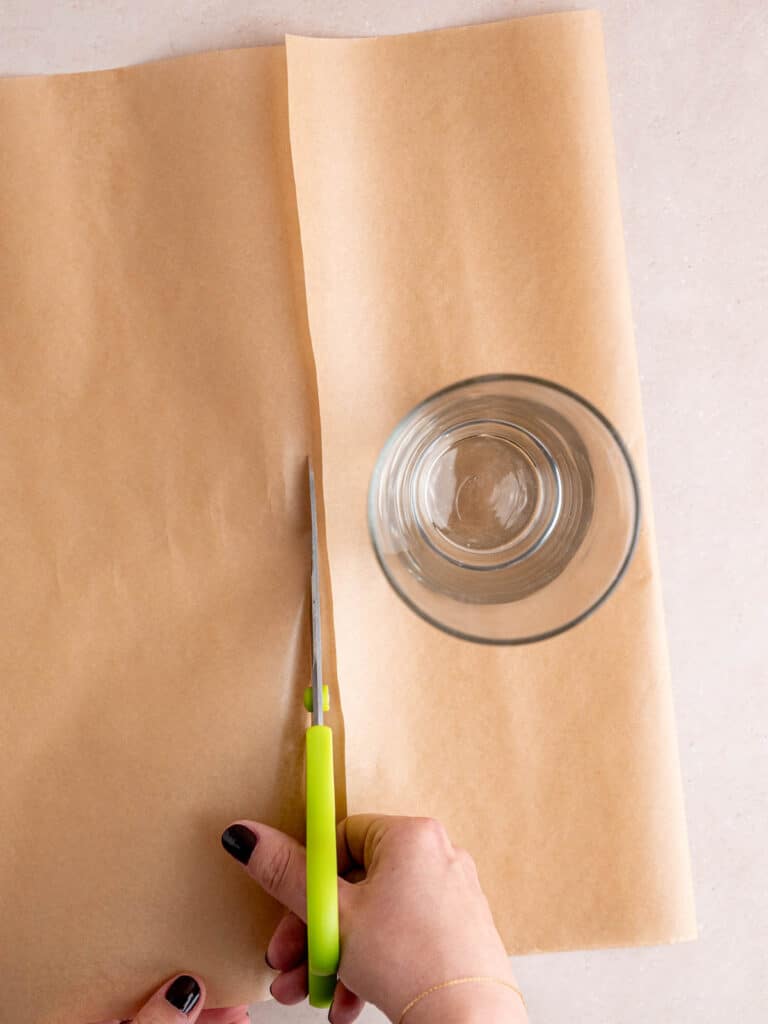
Pro Tip: To get a smooth and even cut, begin with the paper between the inner edges of the scissors. Hold the paper taut with your other hand and run the scissors along the line continuously to prevent jagged lines or torn parchment paper.
Step 3: Now, divide the parchment paper into three equal parts horizontally, creating a trifold, like a brochure.
Depending on the size of your parchment paper and muffin wells, the number of folds may vary. Most importantly, you should fold the paper to get equal squares.
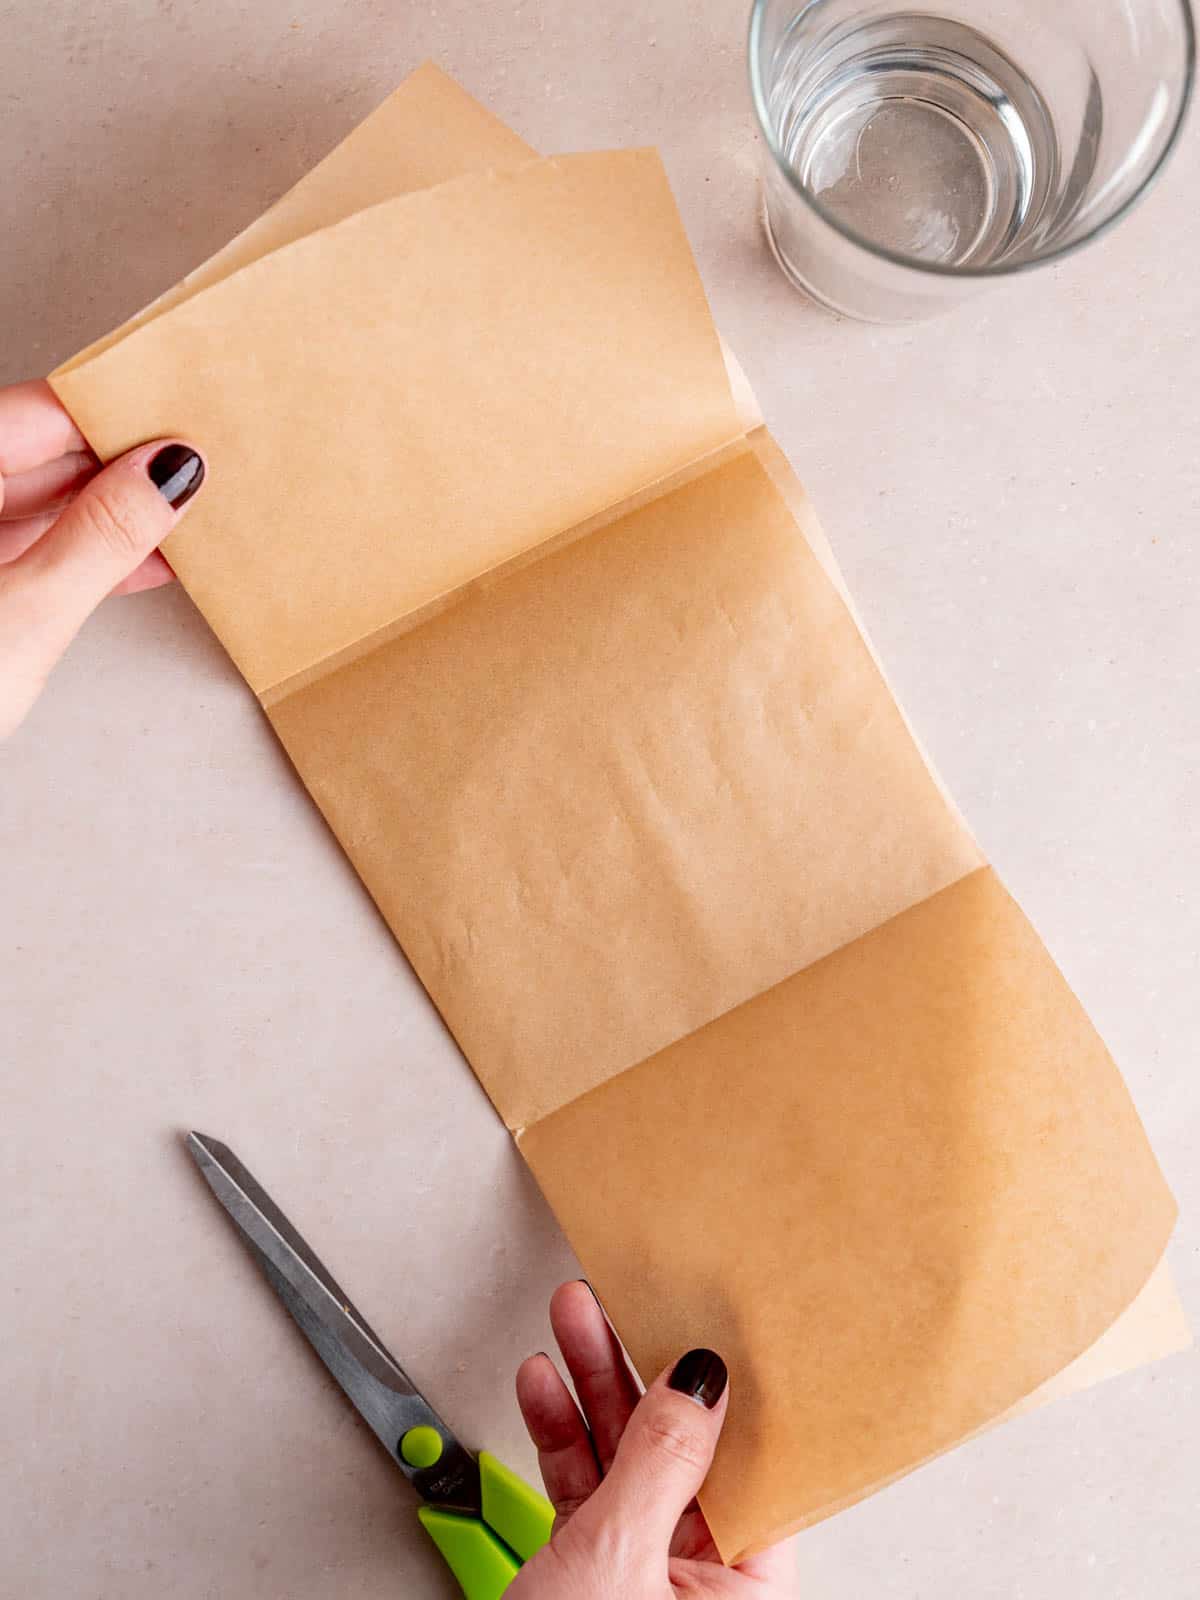
Step 4: Cut the creases of the trifold, including the long one that runs along the middle.
If you have used the same measurements as I have, you should have 6 equal squares.

Pro Tip: I usually cut extra squares and keep them in my drawer for future use. The next time I need more muffin liners, I can go straight to the next step without whipping out the entire roll of parchment paper. Hello, efficiency 🙂
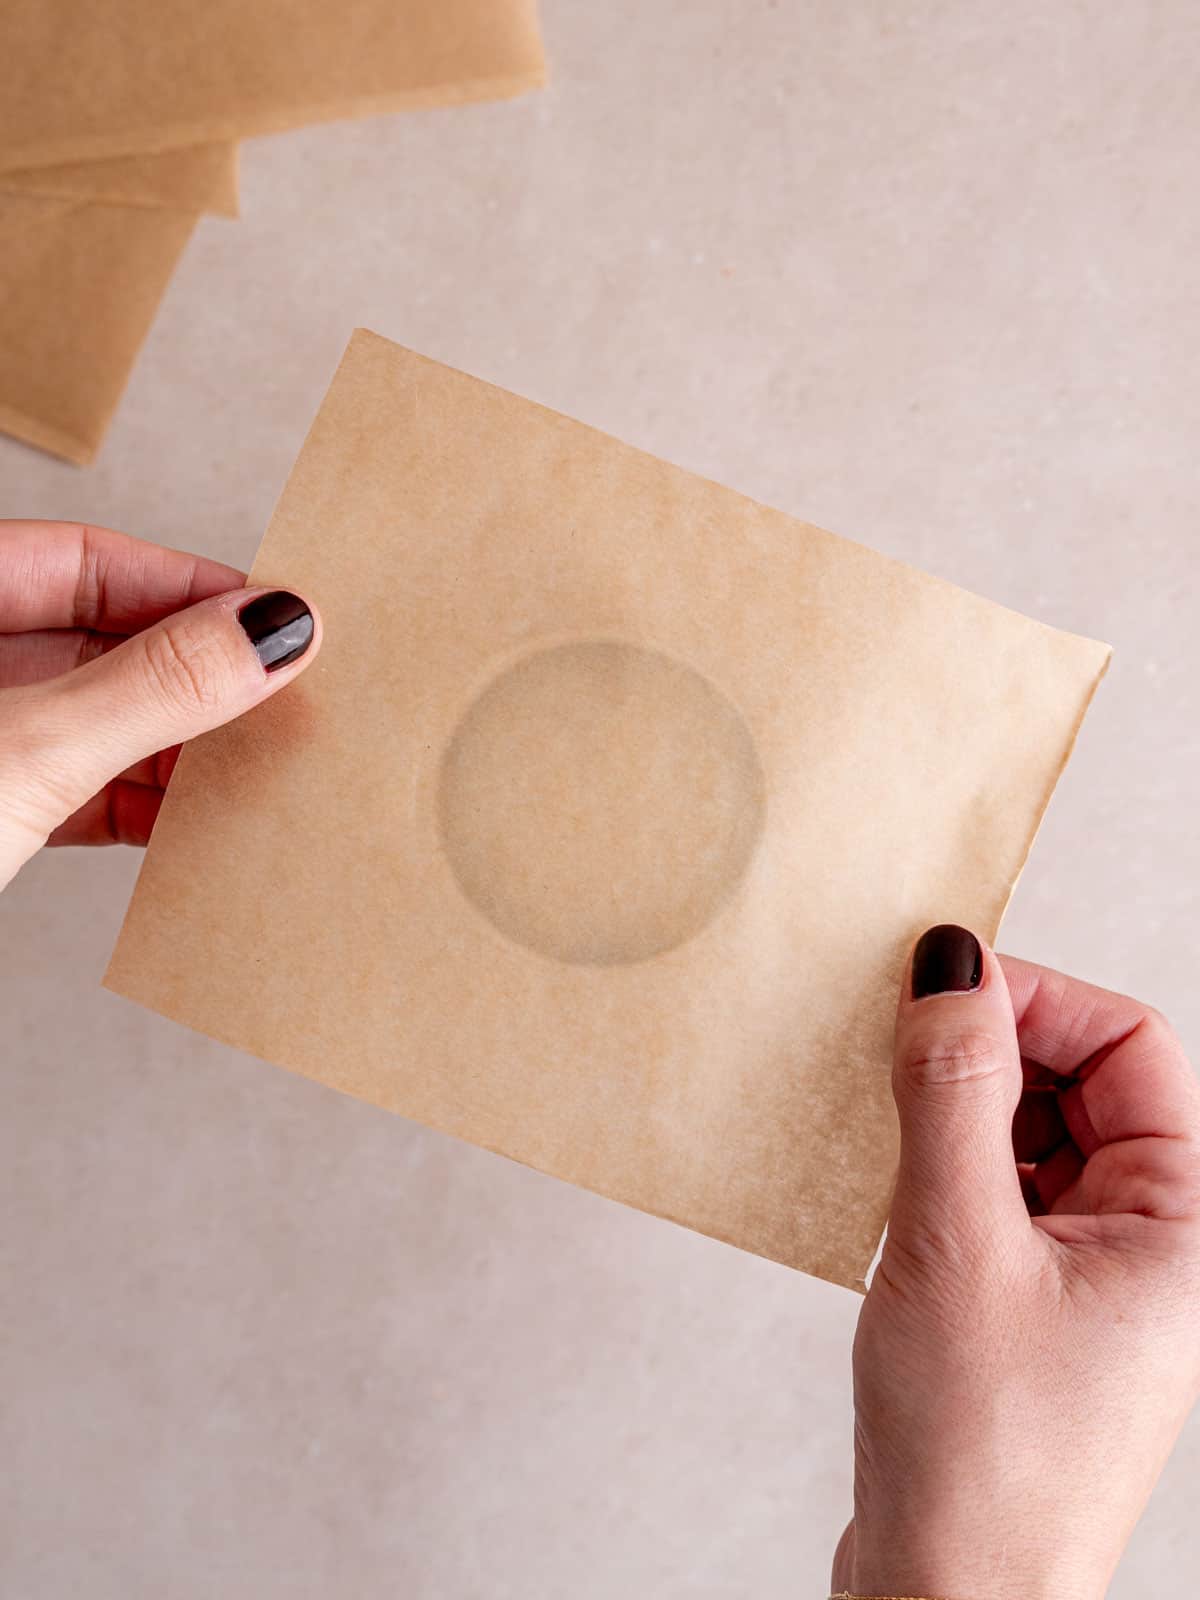
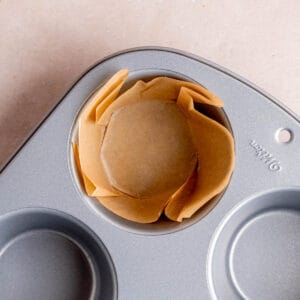
Step 5: Now you're ready to shape each square into a muffin liner.
Place one square over the bottom of the glass and crease the paper over the glass. Then, press the paper firmly over the glass to make sure it holds its form.
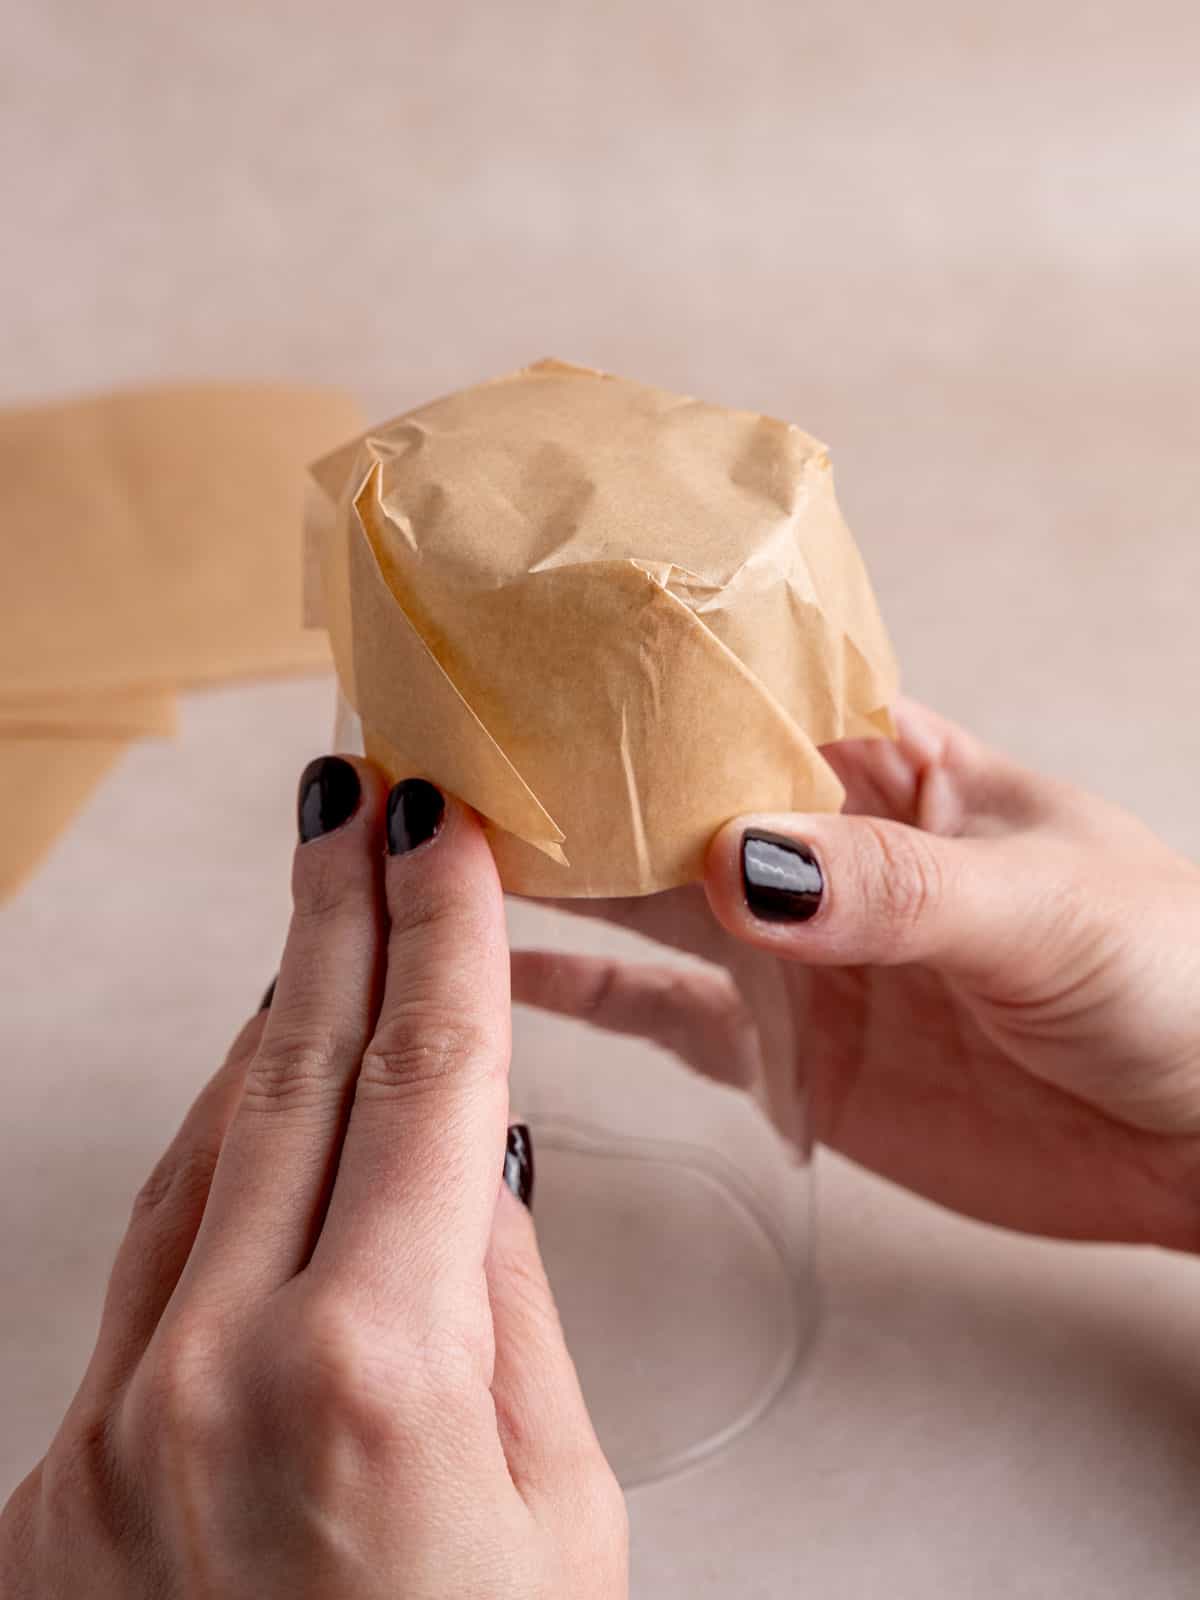
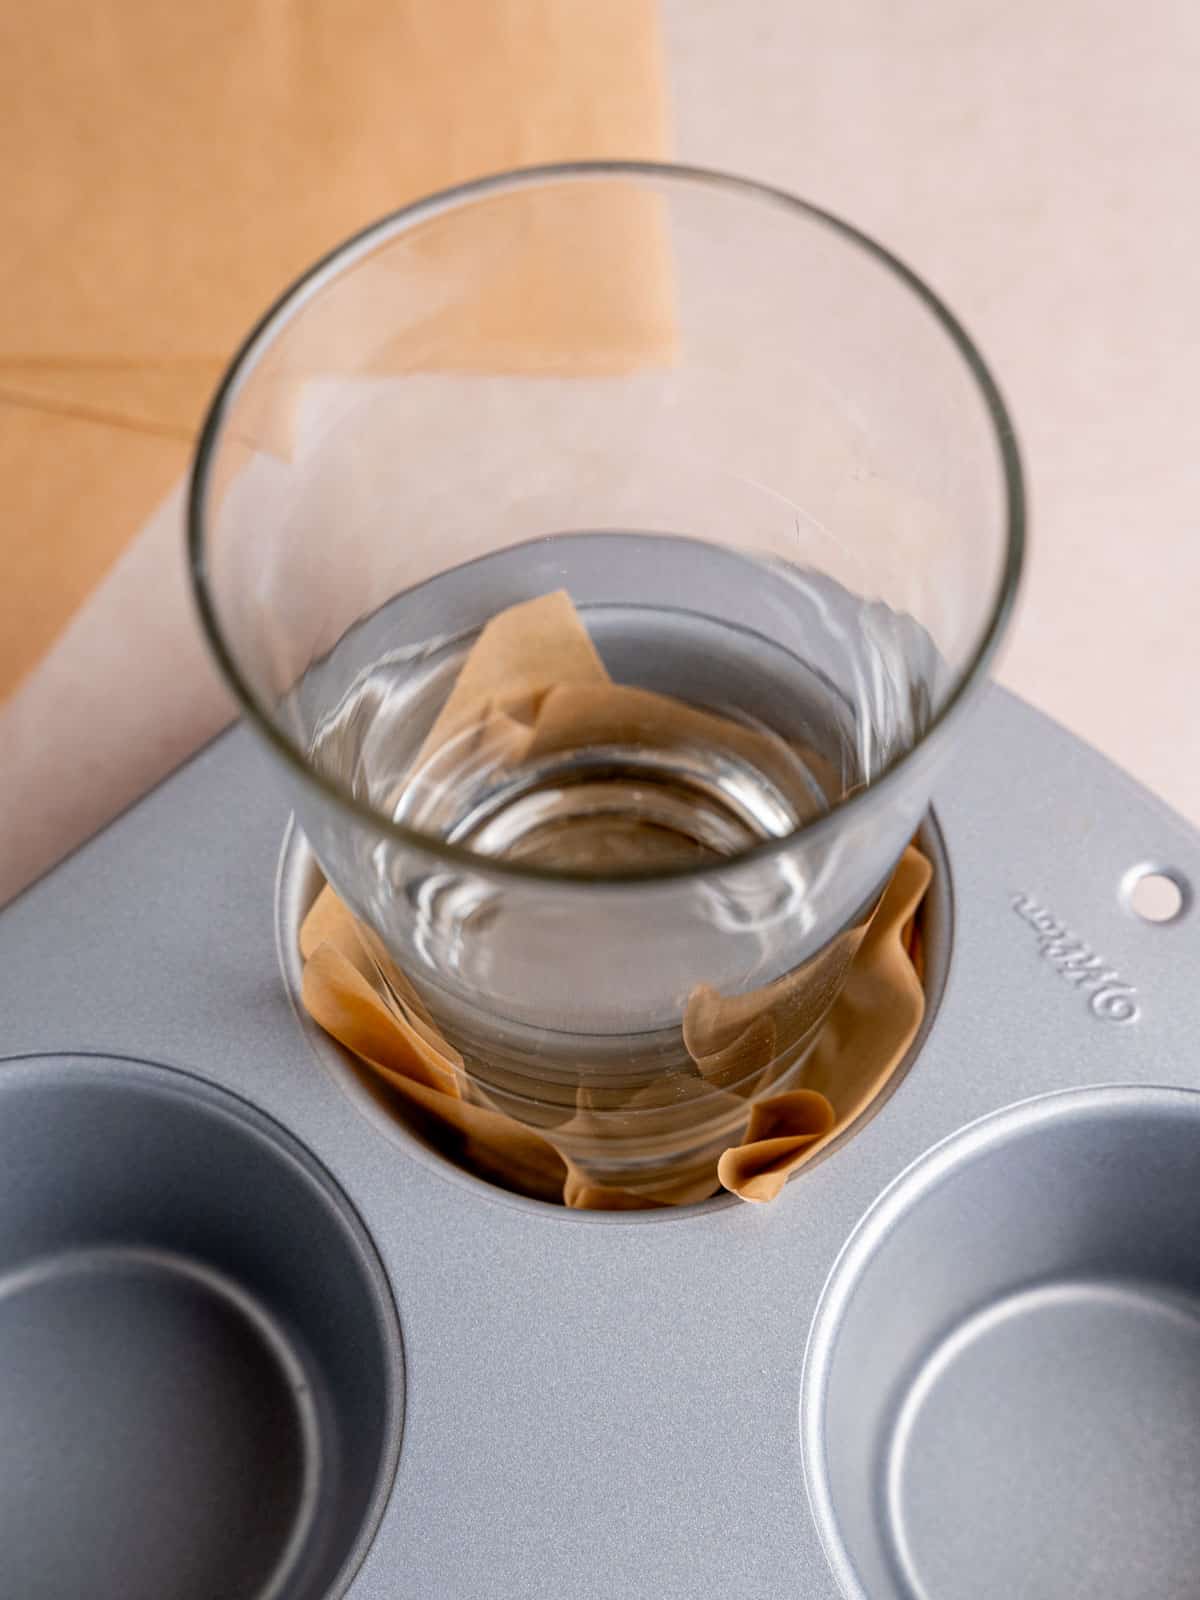
Step 6: Next, press and twist the glass and paper into the pan.
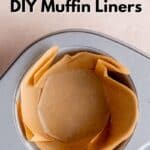
Remove the glass and voila, you have your tulip-shaped muffin liners!
Which is Better: DIY or Store-bought Muffin Liners?

You might be thinking, "Kayla, why spend time doing all that when I can just buy a packet of baking cups from the store?"
I totally get it - time is precious, what with all the baking equipment that needs to be cleaned up! But there are a handful of pros and cons to using DIY muffin liners and store-bought liners.
Pros of DIY Liners
- First, the DIY muffin liner adds to the charm of a home-baked good, made with love. The paper creases and brown paper give each bake a rustic look and a special touch.
- Another benefit of the parchment paper liners is that they're easier to peel off and cleaner, too! The muffin batter sticks less to the parchment paper than they do on store-bought muffin cups.
- You can change up the size of the liners to fit any of your muffin or cupcake pans!
Pros of Store-bought Liners
- Store-bought muffin liners are great because they're ready in a jiffy and easy to store. DIY muffin liners aren't really something you can make in advance since they don't hold their folds.
- They save you precious time that could be spent baking more delicious desserts!
- Some store-bought baking cups are made of silicone, making them easy to clean and reuse over and over again!
Do you prefer homemade or store-bought liners? Comment below and let us know!
Frequently Asked Questions
Muffin liners are baking cups that hold individual muffins. Muffin liners prevent the batter from sticking to the pan. If you're handing these out to family and friends, it's definitely more hygienic to use them!
If you want to make muffins without liners, make sure you have fully greased each muffin pan. The liners are meant to prevent the batter from sticking and overflowing in the pans, so I strongly recommend using a muffin liner!
Technically, parchment paper is made of greaseproof material. Your muffin should release easily without sticking to the paper. But if your batter is extra rich or contains fruits, it might help to use a bit of nonstick spray.
Any non-stick parchment paper should work! I like the Kirkland Signature Culinary Parchment Paper from Costco and the Unbleached Parchment Baking Paper Roll from Amazon.
So, the next time you want to really highlight that homemade-with-love effect in your bakes, try swapping out your store-bought liners with DIY parchment paper ones!
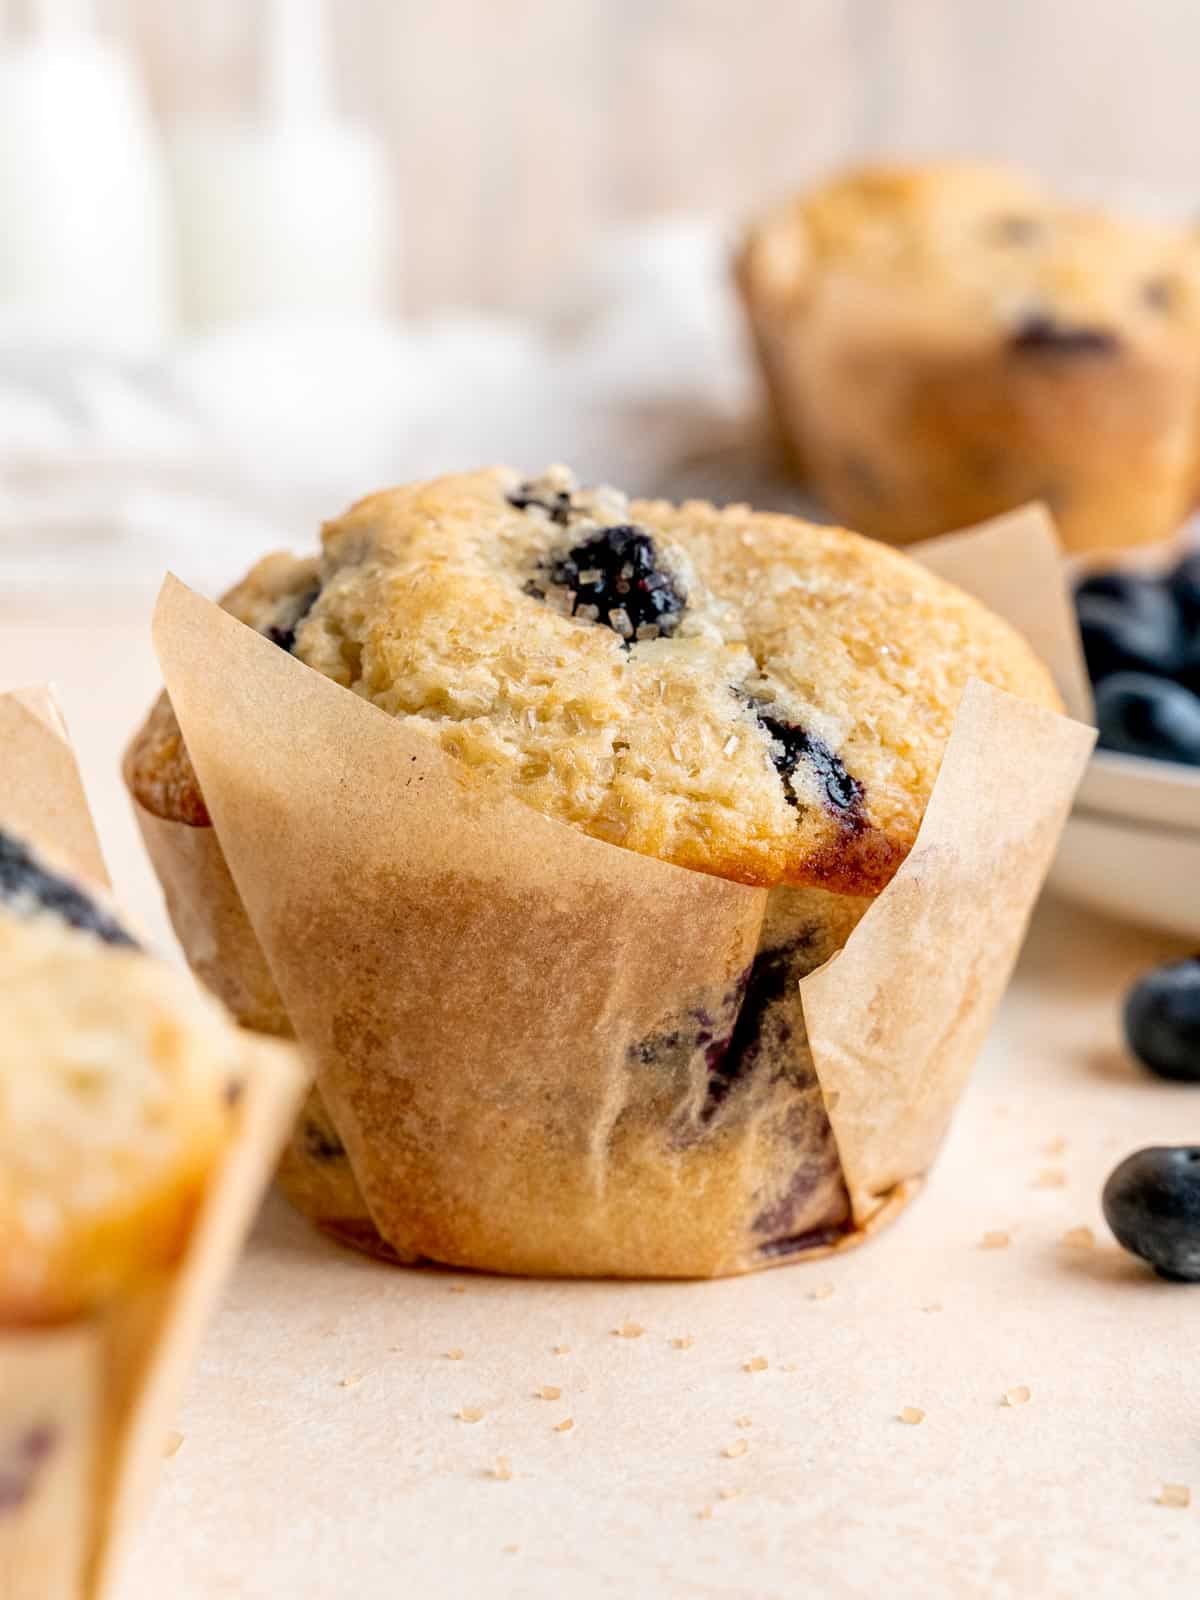
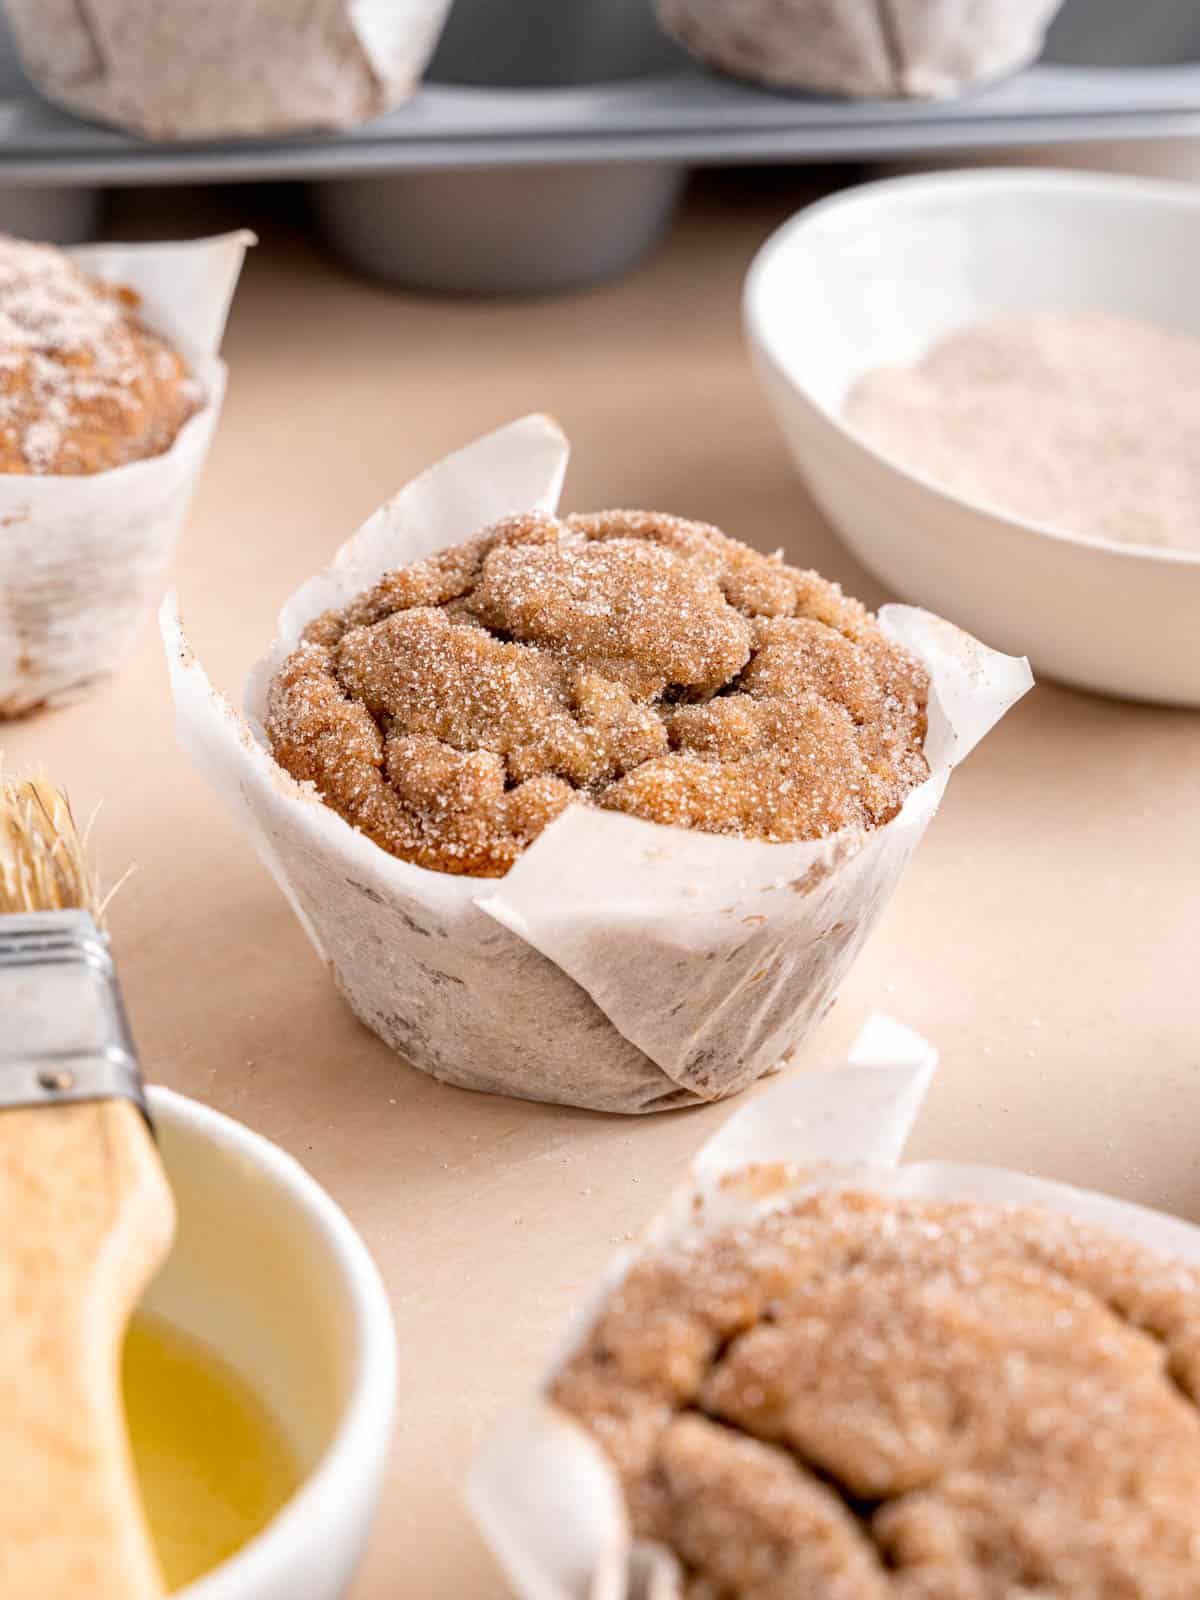
Muffin Recipes with Homemade Liners
I used parchment paper liners in these muffin recipes. Have a look:


Did you try this tutorial? I'd love to see how they turned out! Leave a ⭐️⭐️⭐️⭐️⭐️ rating below and tag me on social media @brokenovenbaking!
How to Make Muffin Liners From Scratch
Equipment
- Parchment paper
- Scissors
- Muffin pan
- Glass or can that fits inside muffin pan
Instructions
- Fold a sheet of parchment paper like a hot dog bun (without creasing it) and place the bottom of the glass on top of the fold. Adjust the paper so that it extends 1-2 inches on each side of the glass. Crease it.
- Cut the paper where the fold ends so you have one nicely folded sheet of parchment paper.
- Add folds in the opposite direction of the current fold to create equal squares.
- Cut along all creases so you end up with multiple parchment squares of equal sizes.
- Repeat the above steps until you have a square for each muffin. Feel free to cut extras and set them aside for a later date!
- Place the glass upside-down on your table and one at a time, place a parchment square over the bottom of the glass. Fold it over to crease it into a cup shape.Then, carefully place the glass (with the paper still folded over it) into the muffin pan. Press down and twist, then remove the glass and repeat with the rest of the parchment squares.
Video
Notes
- Jumbo muffin pans: cut 6 inch squares
- Regular muffin pans: cut 5 inch squares
- Mini muffin pans: cut 3-4 inch squares
Comments
No Comments