
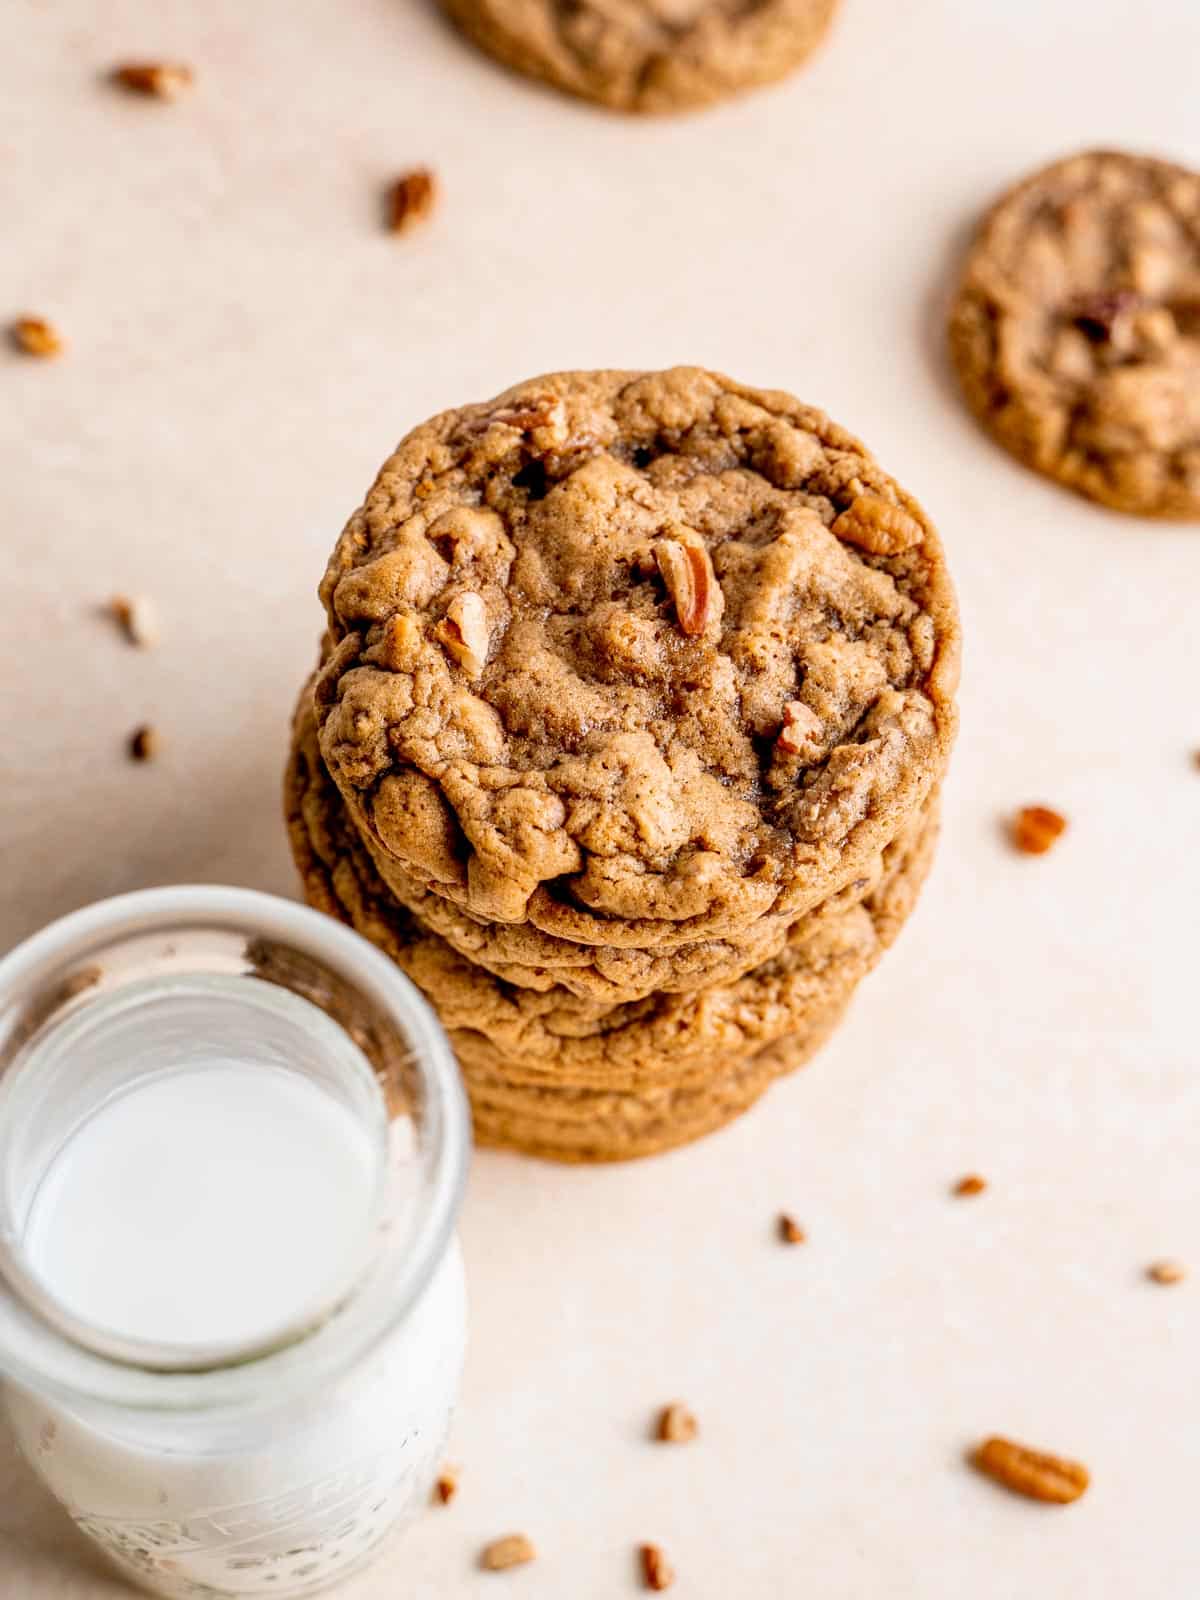
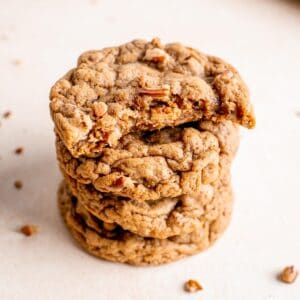
All the tasty fall flavors are wrapped up in these Maple Pecan Cookies! They've got maple syrup, chopped pecans, cinnamon and nutmeg in every bite. This recipe doesn't use any maple extract, just pure maple syrup! The maple flavor pairs really well with the pecans and the syrup makes the cookies so chewy and delicious! They're much less chocolatey than my Pecan Brownie Pie, but quite a bit simpler!
Save This Recipe! 💌
What You Need to Make These Cookies
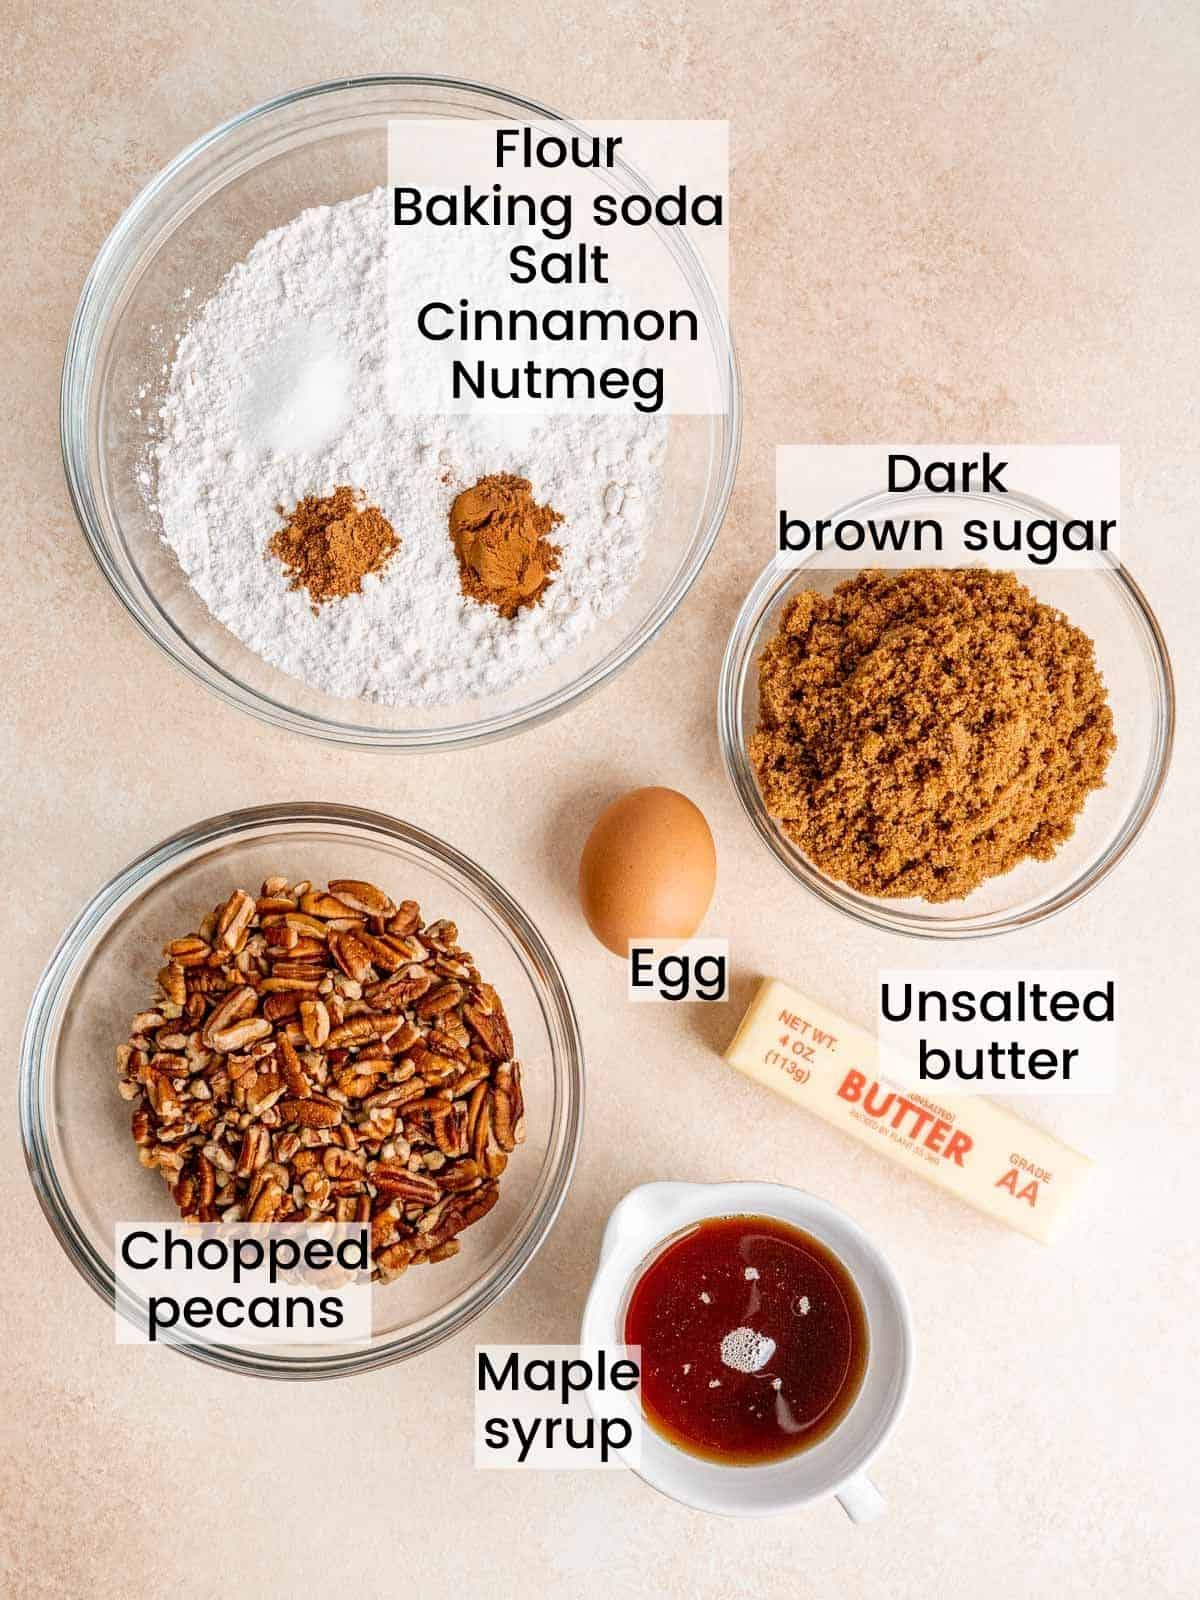
Ingredients:
- All purpose flour
- Baking soda
- Salt
- Cinnamon
- Nutmeg
- Unsalted butter
- Dark brown sugar (light brown sugar works too)
- Egg
- Maple syrup
- Chopped pecans
- Cream cheese (optional icing)
- Powdered sugar (optional icing)
- Milk (optional icing)
Equipment:
- Baking sheet
- Large cookie scoop
- Mixing bowls
- Measuring spoons
- Scale or measuring cups
- Hand mixer or stand mixer with paddle attachment
- Whisk
- Spatula
Step by Step Instructions
Step 1 (Picture 1 below) - Combine the dry ingredients.
In a medium bowl, whisk together the flour, baking soda, salt, cinnamon and nutmeg. Set this aside while you make the rest of the dough.
Step 2 (Picture 2 below) - Mix together the wet ingredients.
Using a hand mixer or stand mixer fitted with a paddle attachment, cream together the softened butter and brown sugar. Scrape the sides as needed and stir until it's light and fluffy. Mix in the egg really well, and then the maple syrup.
Step 3 (Picture 3 below) - Add dry to wet.
Pour the flour mixture into the wet ingredients and mix just until there are only a few flour streaks remaining.
Step 4 (Picture 4 below) - Pour in the pecans!
Before adding the pecans, I like to crush up the big pieces. Even though I buy pre-chopped pecans, I like having smaller bits in my cookies. This is totally a preference thing, if you want big pieces of pecans then feel free to dump them in the dough as is!
Step 5 (Picture 5 below) - Scoop & bake!
Using a big scoop, place cookie dough balls on a baking sheet at least 3 inches apart. They'll spread a bit while they bake.
Step 6 (Picture 6 below) - Scoot the cookies!
Cookie scooting is one of my favorite baking hacks! As I mentioned, these cookies will spread so they probably won't come out as perfect circles. There's nothing wrong with this, they'll still taste amazing! However, if you want to make them pretty & round, place a large circular tool (like a sifter or biscuit cutter) over the warm cookies and gently move it around to bring their edges back into place.
Step 7 (Optional) - Make the icing.
Mix together cream cheese, butter, powdered sugar and milk. After you've let the cookies cool completely, drizzle the cream cheese icing over the cookies, or dunk them in it!


Expert Tips
Use room temperature ingredients - all of the cookie components combine way better when they're at the same ambient temperature! If you store your maple syrup in the fridge, take it out along with the egg and butter about 30 minutes before you start baking!
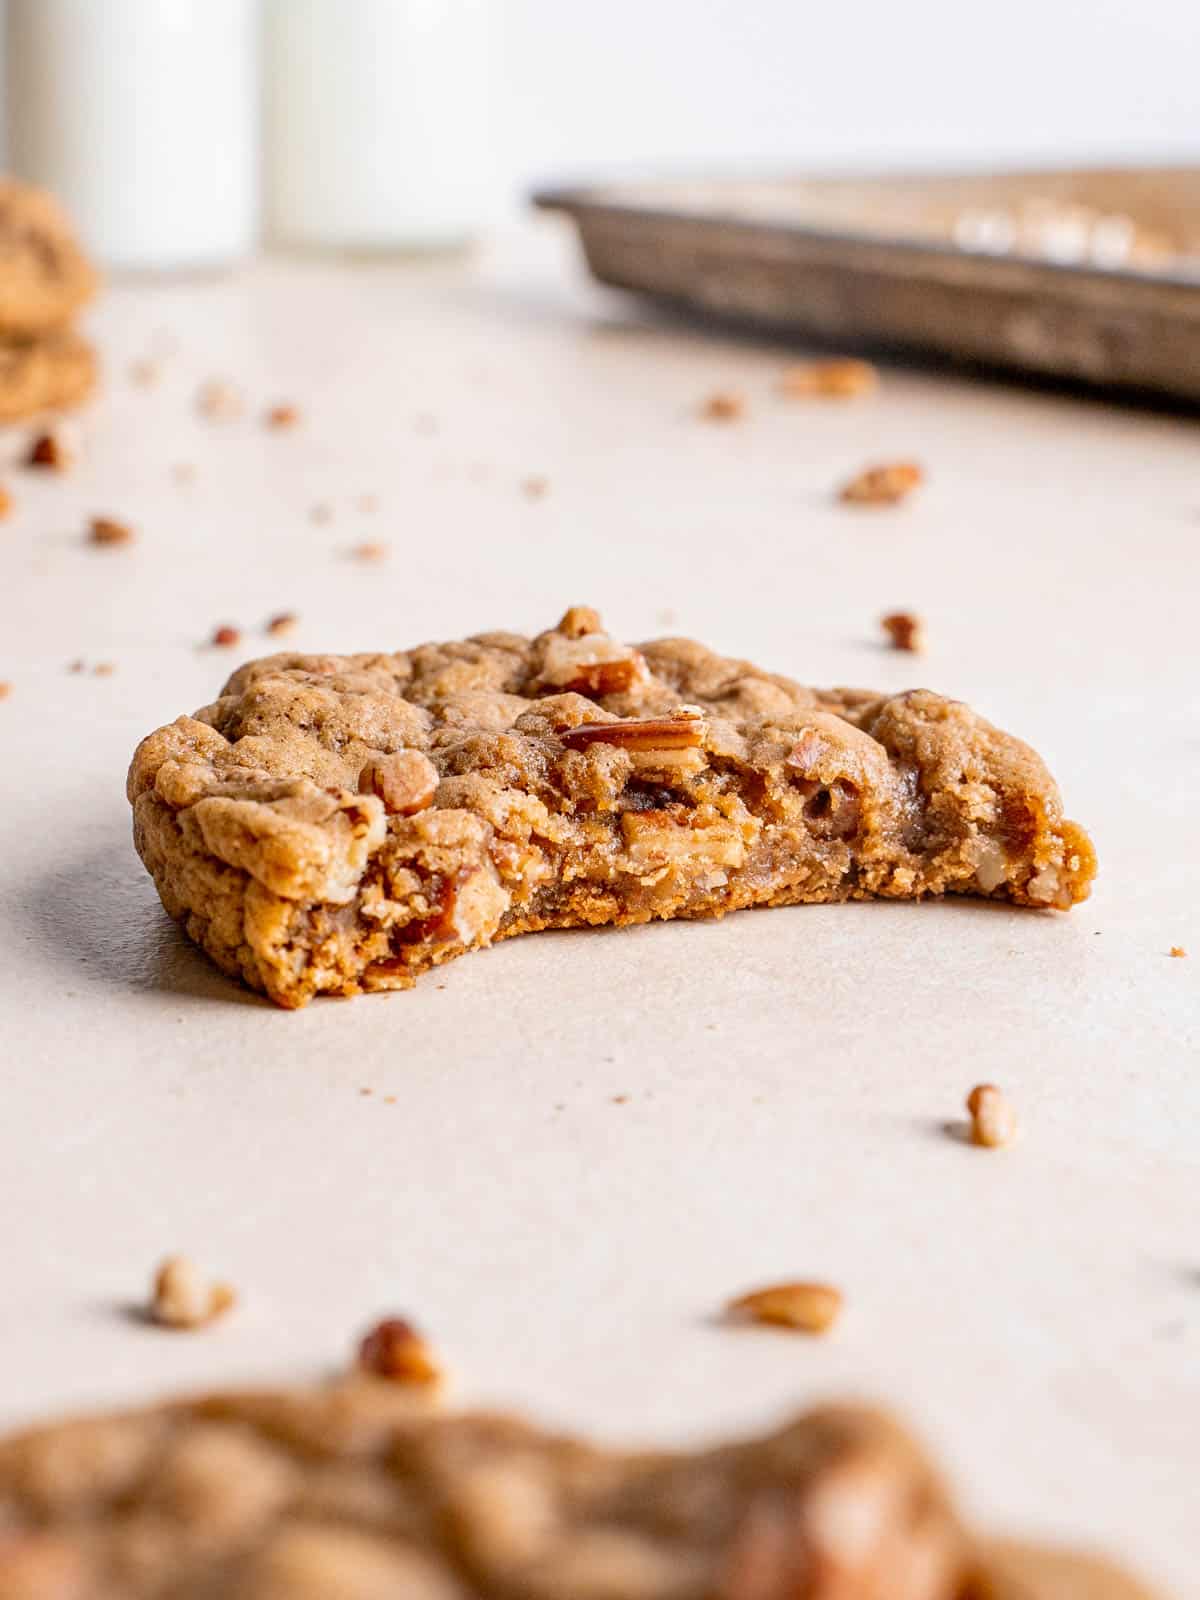
Don't overbake them - take them out of the oven when the edges are turning tan. The centers might still look slightly uncooked but they'll continue to bake on the tray. If you wait until the centers look completely baked, they won't be as soft and chewy!
Use pure maple syrup - the only ingredient should be maple syrup. Pancake syrups have a lot of added sugar and other things that can alter the flavor and texture of the cookies.

Recipe FAQs & Storage
No, but you can refrigerate it for up to a day if you'd like.
If walnuts are more your thing, go for it!
No, but if you try them with gluten free ingredients I'd love to hear how they turn out!
In an airtight container at room temperature for up to 1 week.
Check out more cozy fall recipes! 🍁


📖 Recipe
Maple Pecan Cookies
Equipment
- Baking sheet
- Large cookie scoop
- Mixing bowls
- Measuring spoons
- Scale or measuring cups
- Hand mixer or stand mixer with the paddle attachment
- Whisk
- Spatula
- Cooling rack
Ingredients
Cookie Dough
- 2½ cups (312.5 g) all-purpose flour
- 1 teaspoon baking soda
- ¾ teaspoon salt
- 1 teaspoon ground cinnamon
- ½ teaspoon ground nutmeg
- ½ cup (113.5 g) unsalted butter room temperature
- 1 cup (200 g) dark brown sugar packed (light brown sugar works too)
- 1 large egg room temperature
- ½ cup (118.29 ml) pure maple syrup
- 1½ cups (163.5 g) chopped pecans
Cream Cheese Icing (optional)
- 1 tablespoon cream cheese room temperature
- 1 tablespoon unsalted butter room temperature
- 1 tablespoon milk
- ½ cup (60 g) powdered sugar
Instructions
Cookies
- Preheat your oven to 350°F. Line a baking sheet with parchment paper for easy cleanup (optional).
- In a medium bowl, whisk together the flour, baking soda, salt, cinnamon and nutmeg. Set aside.
- In a large bowl, cream together the butter and brown sugar with a stand mixer paddle or hand mixer for 1-2 minutes. Stir in the egg, followed by the maple syrup.
- Slowly mix the dry ingredients into the wet ingredients just until the flour streaks are almost gone. Scrape the sides of the bowl with a spatula as necessary to get all of the ingredients incorporated well. Stir in the chopped pecans.
- Using a large cookie scoop, place dough balls onto the prepared baking sheet about 3 inches apart. Bake for 10-14 minutes or until the edges start to turn light tan. The centers will still look a bit gooey, that's okay! They'll continue to bake outside of the oven on the baking sheet and will stay soft.
- If you want to make the cookies nice and round, place a large circular object around them (like a sifter or biscuit cutter) and scoot them around while they're hot out of the oven.
- Let the cookies cool for 5-10 minutes on the baking sheet and then transfer them to a cooling rack.
Cream Cheese Icing (optional)
- Cream together the softened cream cheese & butter until smooth, then mix in the powdered sugar and milk really well.
- Drizzle icing over cooled cookies or dunk them in it!
Amazing cookies! I was baking them when i had decorators in house and offered them to them as soon as they came out oven...great success!
Love to hear that!! Thank you, Annabel!
This is my new favorite recipe! I changed 2 things because I'm Celiac and also can't have nutmeg. So I used King Arthur Gluten Free All Purpose Flour (the one in the box without xanthan gum, not the Measure for Measure gf flour) and substituted cardamom for nutmeg. These are DELICIOUS cookies, and I'm excited to find your recipe! Thanks so much for sharing! Happy New Year!!
Aw yay, I'm so glad you were able to enjoy these cookies!! Thank you for sharing the substitutions you used! Happy New Year, Lillie 🙂
This recipe is amazing!! I have never rated a recipe before but had to this time because the cookies are that good.
Has anybody commented that you never said where or went to add the pecans? You gave me a laugh, considering they are maple pecan cookies. Very good!
Hi Christine! I totally believed you for a second haha but they're mentioned in step 4 of the recipe card 🙂
These were so perfect for an Autumn food craving on a cloudy November day. They made the house smell so delicious.
They were easy to make and I loved the touch of maple syrup.
Oh good, I'm so happy you liked them! Thank you, Vallie 🙂
They taste more like an oatmeal cookie without the oats. They’re ok. Will not make again the cinnamon & nutmeg overpowered the maple flavor which suppose to be maple pecan.
Made these for a holiday cookie exchange and they were a hit! Also very easy to make!
I made these for my family, then made them for a big event, and I had so many people ask for the recipe. I'm about to make them for a HUGE bake sale.
Aw yay!! This is so exciting! I'm glad you're all enjoying them 😀 thanks for making and sharing them, Alianna!
Yummmmmm! I made these and then made a bunch for an event. Yummmmm