

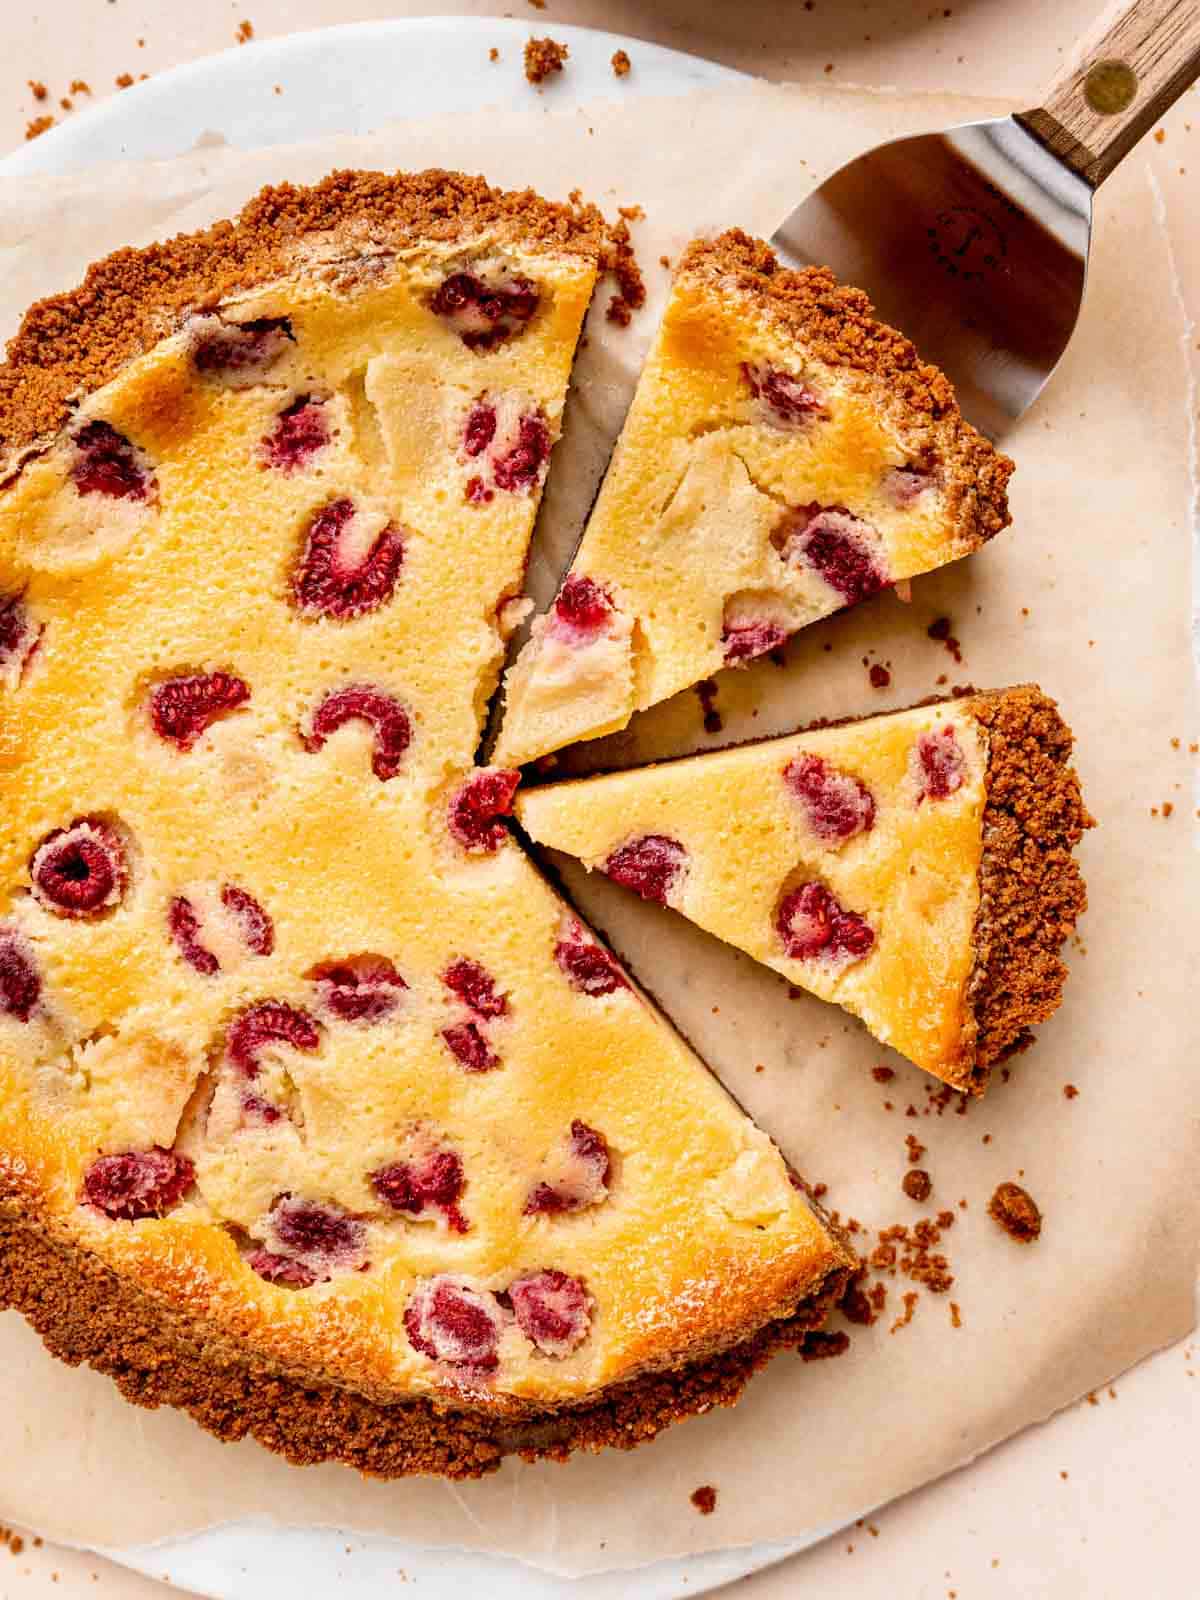
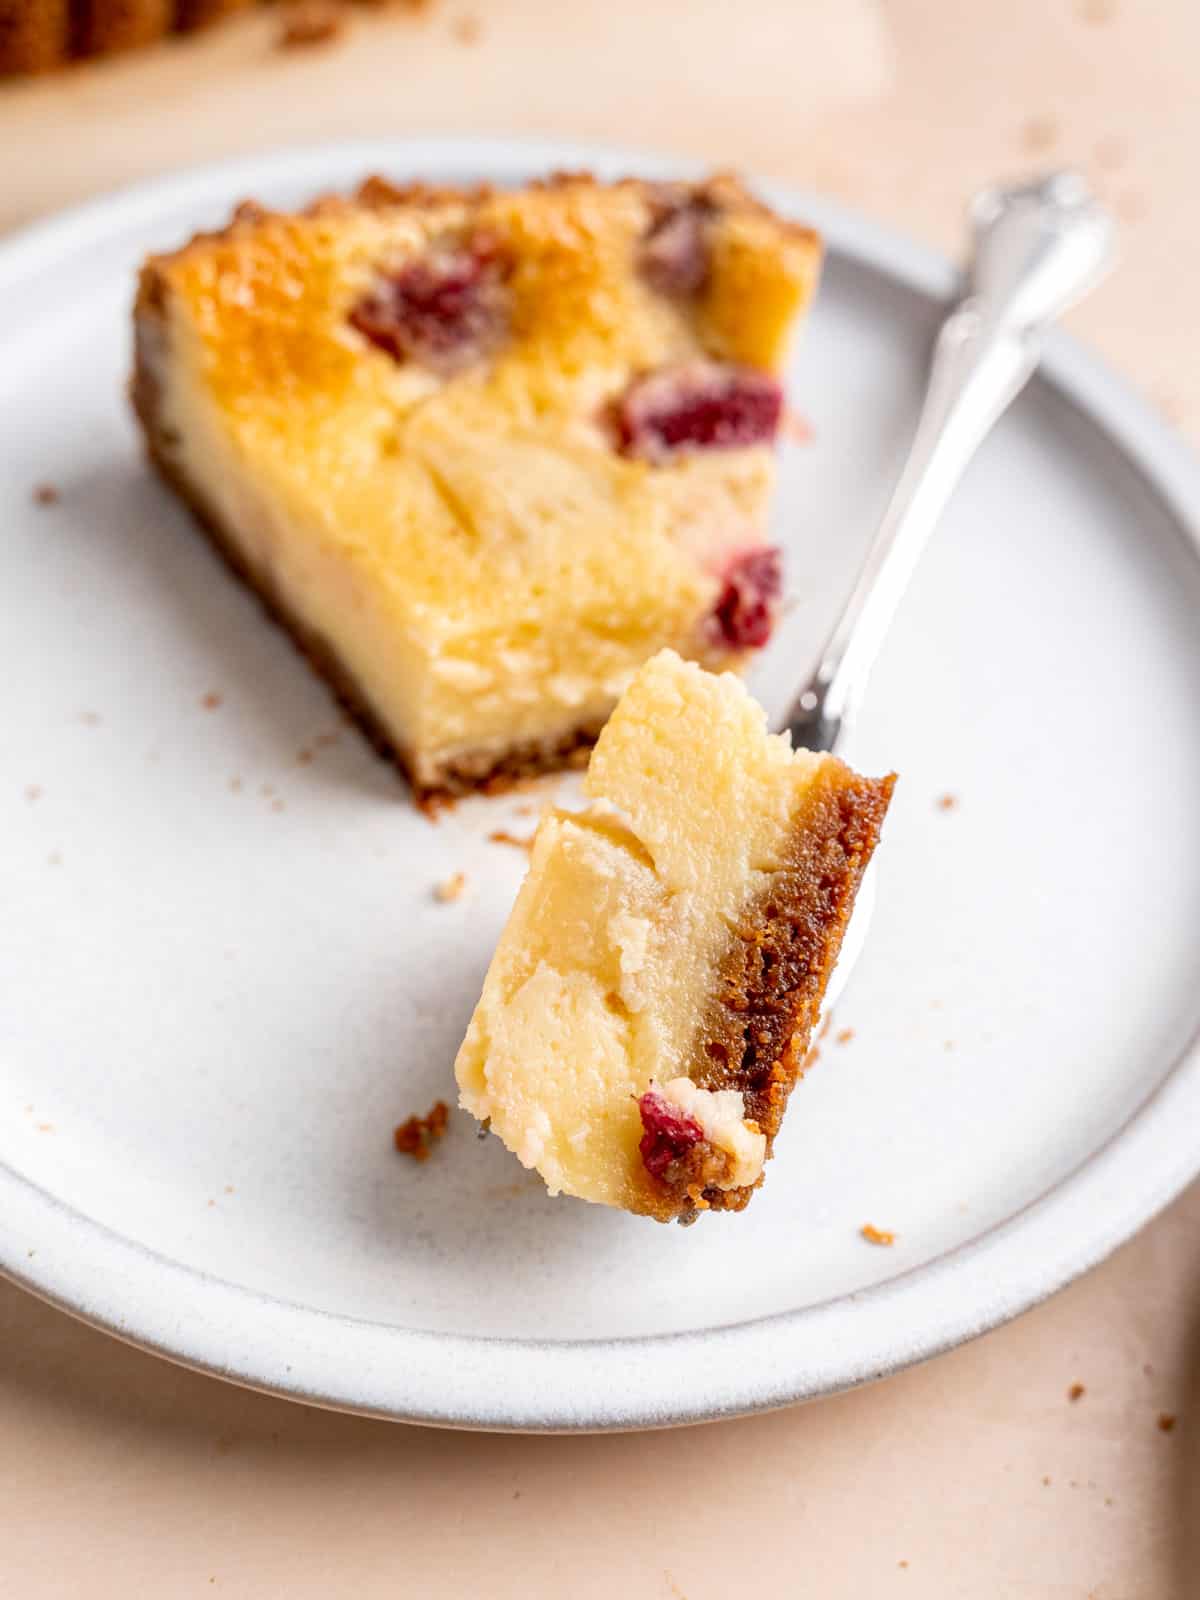
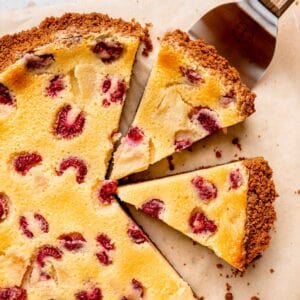
My Pear and Raspberry Buttermilk Tart has a Biscoff cookie crust filled with a buttermilk custard, pears, and raspberries. It has complex flavors and textures but is surprisingly quick and easy to make!
Save This Recipe! 💌
Making pies and tarts can be intimidating, but this pear and raspberry tart starts with a simple Biscoff cookie crust that you press into a tart pan rather than having to make a pastry crust from scratch.
The custard filling comes together by whisking all of the ingredients in a bowl and then covers the chopped fruit in the crust - it doesn't get much easier than that!
This tart recipe was inspired by Bang Bang Pie & Biscuits here in Chicago. I tried their pear and raspberry buttermilk pie over the summer and I could not stop thinking about it, it was so good!! If you ever have a chance, I highly recommend stopping in and grabbing a slice of pie there.
Jump to:
Why You'll Love This Recipe
- The sweet, spiced cookie crust adds a rich, caramelized flavor to this fruit tart.
- The filling is super creamy and can be made in a blender (no mixing bowls or mixers required for this recipe).
- It uses canned pears so you can make it all year long!
- This buttermilk pear tart has raspberries which add a delicious, bright pop of flavor and color.
Ingredients
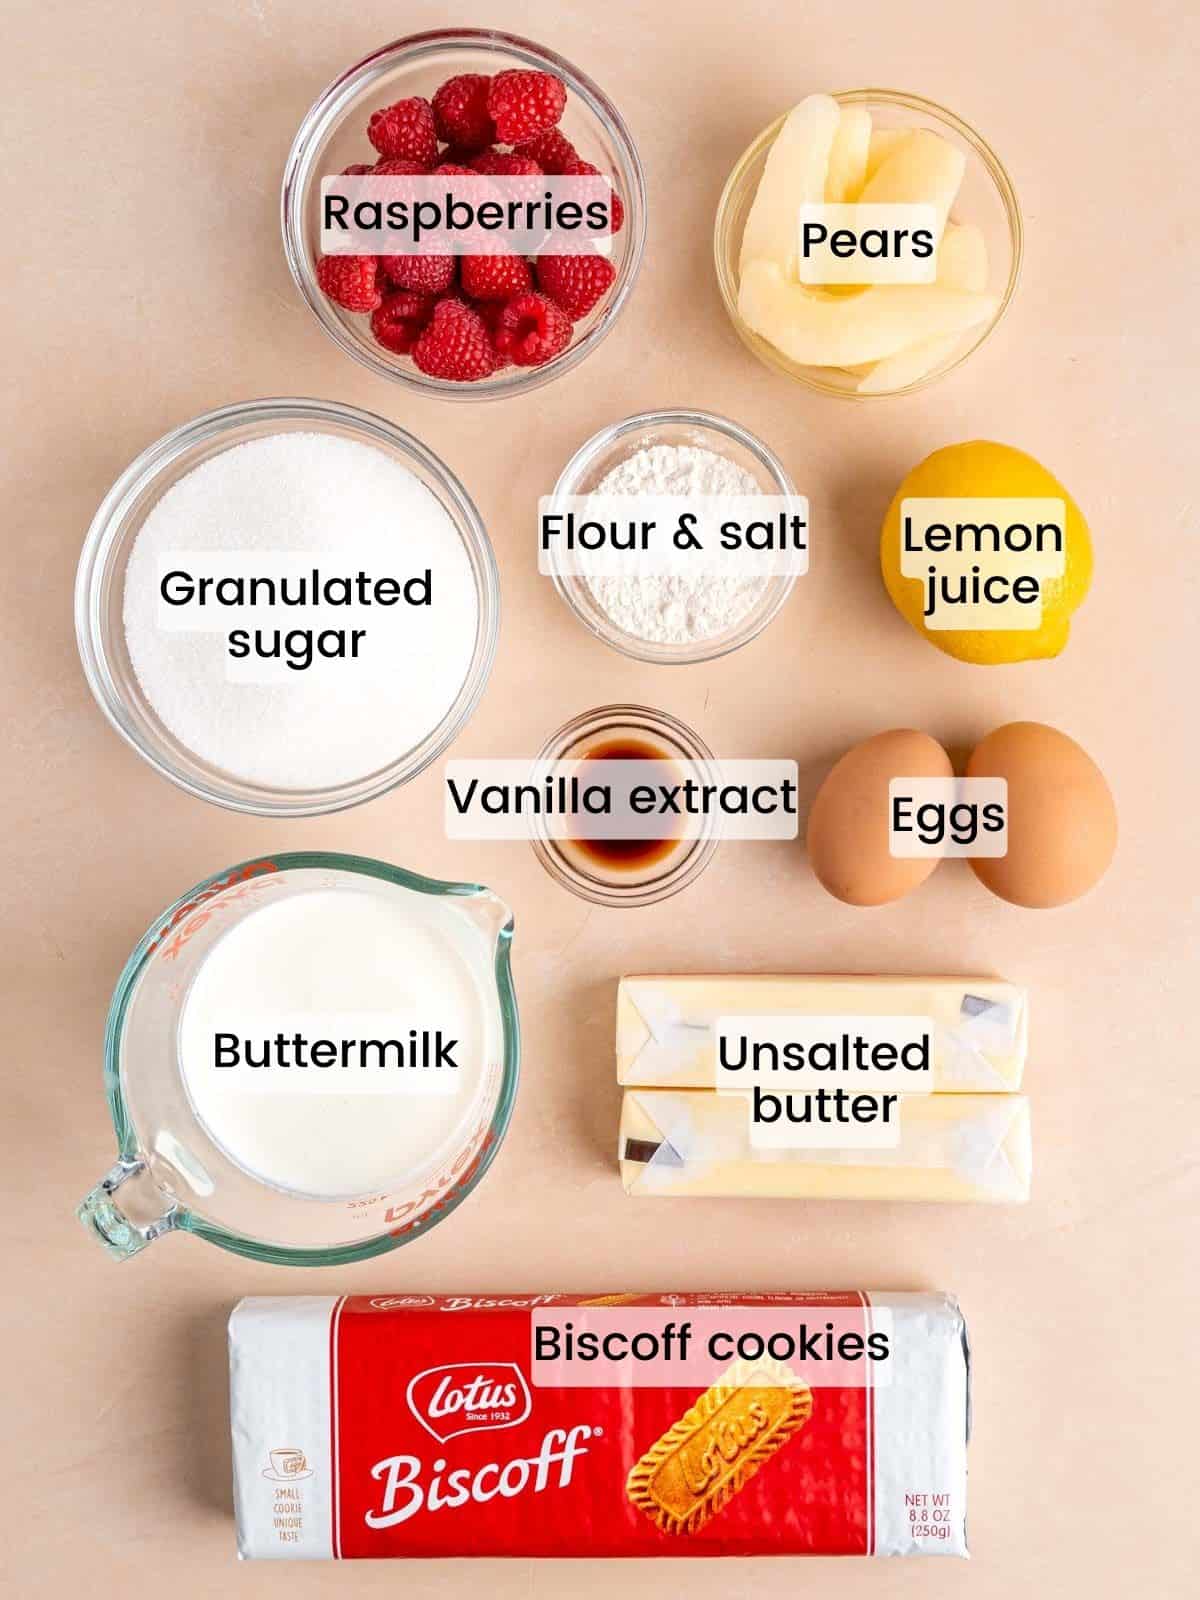
- Biscoff cookies are crushed to make the pie crust. Collect these cookies on your next flight, or purchase them in the cookie aisle of your grocery store.
- Buttermilk adds creaminess and a slight tang to the custard filling.
- Vanilla extract helps flavor the custard.
- Canned sliced pears and fresh raspberries top the custard to make the best fruit tart! Be sure to grab a can of pears that doesn't have any sugar added.
See recipe card below for a full list of ingredients and measurements.
Substitutions & Variations
- Very ripe, peeled pears can be used in place of the canned pears. Or, completely swap the pears for canned peaches.
- Use graham crackers instead of Biscoff cookies for a graham cracker crust. Follow my graham cracker pie crust recipe for this variation.
- Swap in any variety of berries, such as blueberries or blackberries, in place of the raspberries. I do not recommend using frozen berries in this recipe.
This recipe has not been tested with other substitutions or variations. If you replace or add any ingredients, please let us know how it turned out in the comments below!
Step by Step Instructions
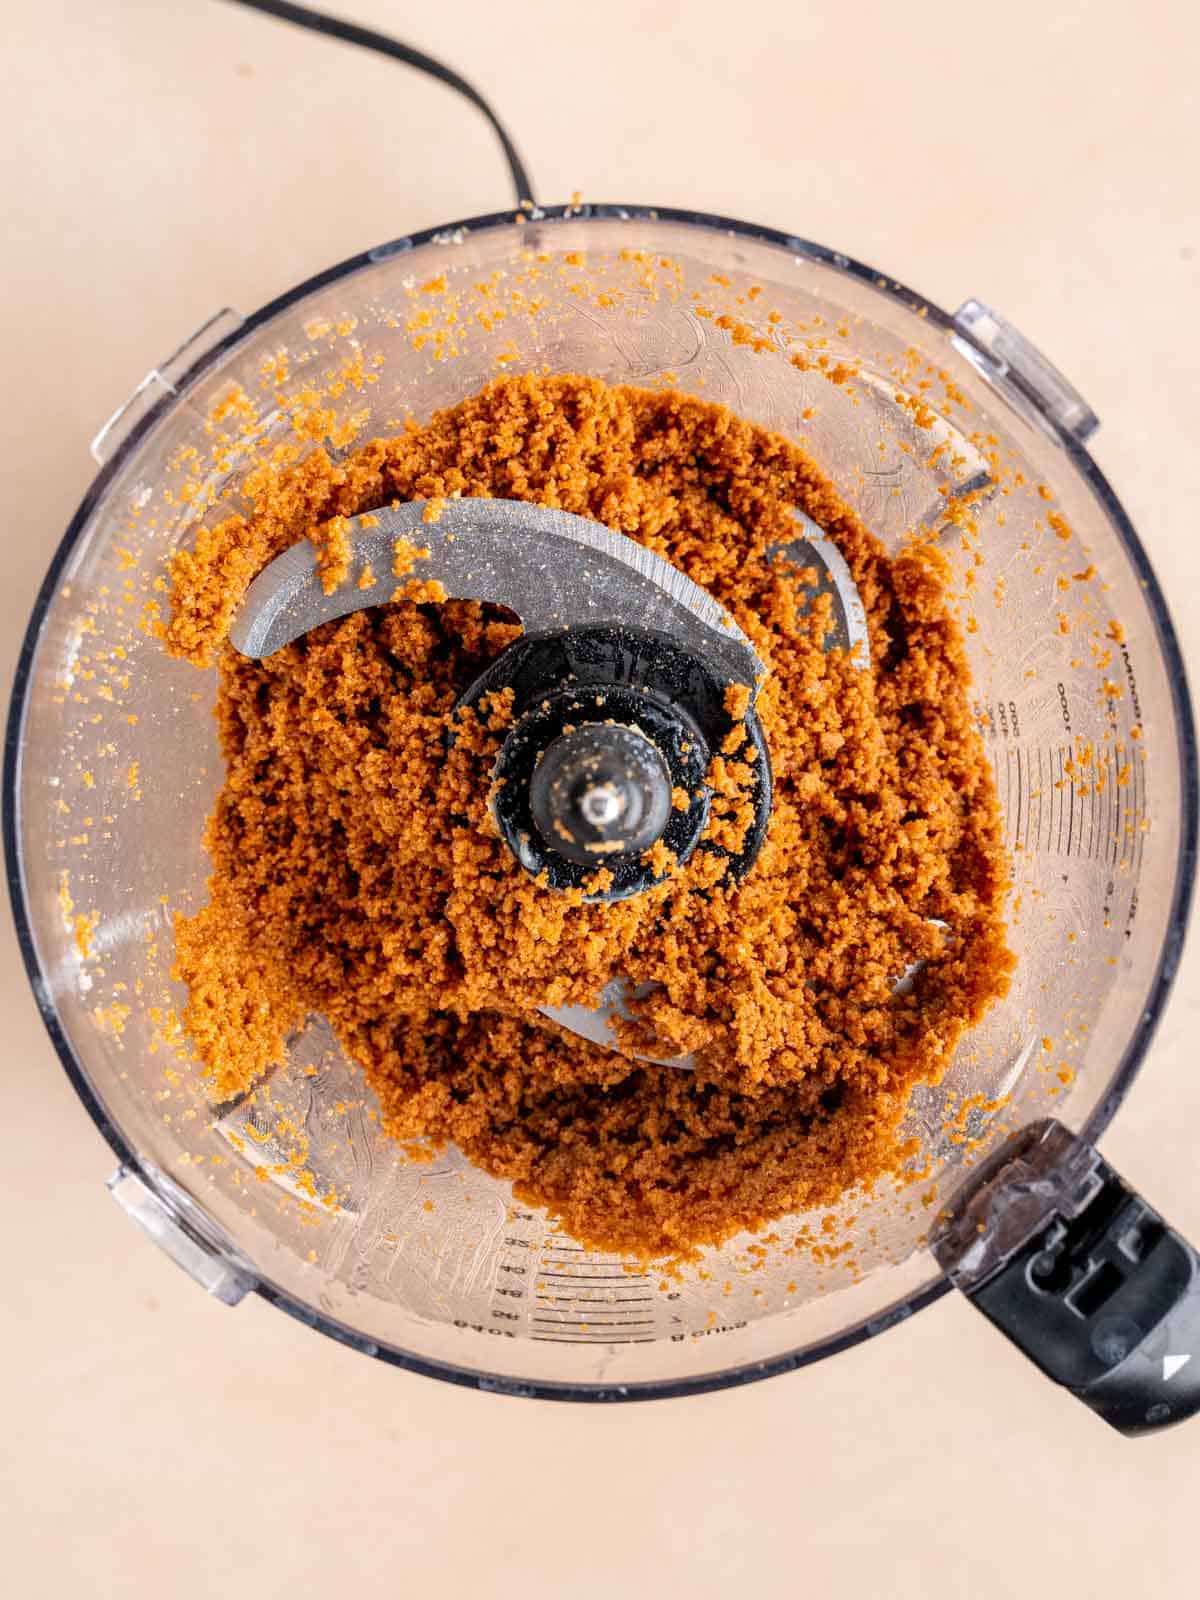
Step 1: To make the cookie crust, pulse the Biscoff cookies in a food processor with the melted butter and sugar until it is the consistency of wet sand.
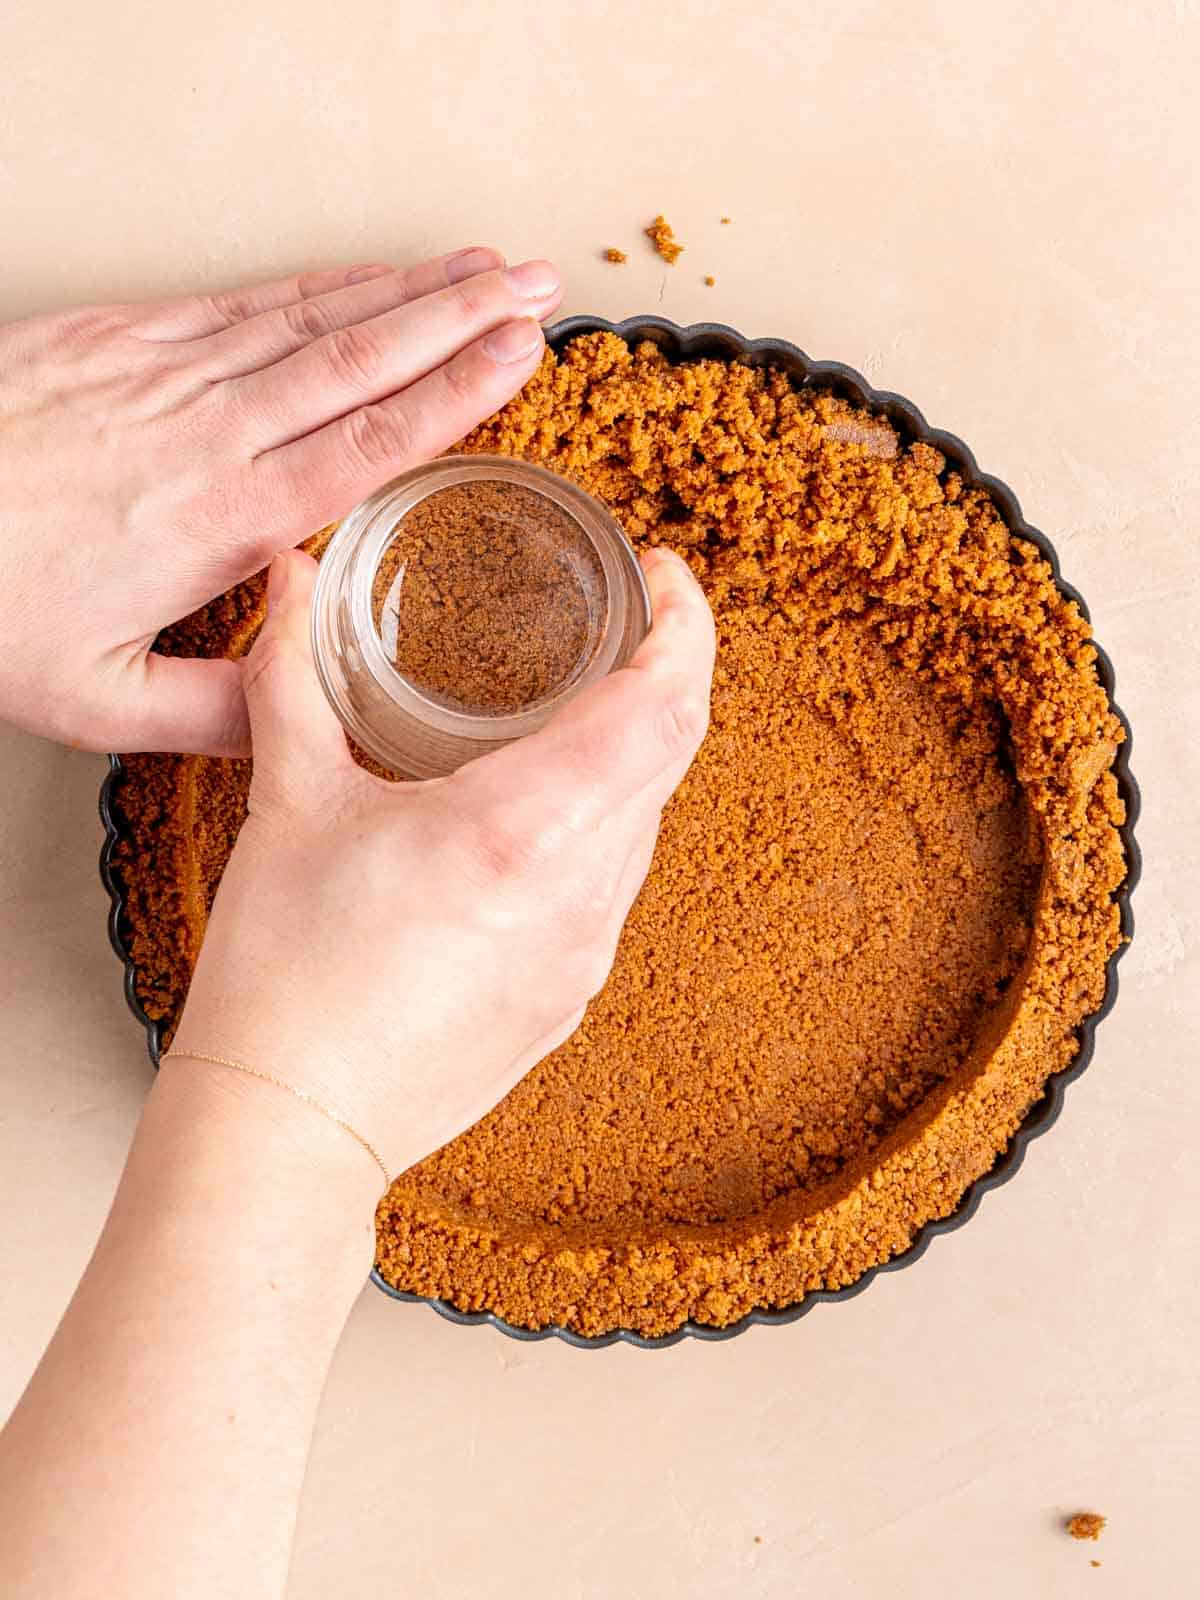
Step 2: Pour the cookie crumbs into a 9-inch tart pan and press firmly into the pan. Bake at 350°F for 7 minutes. Place it on a wire rack to cool.
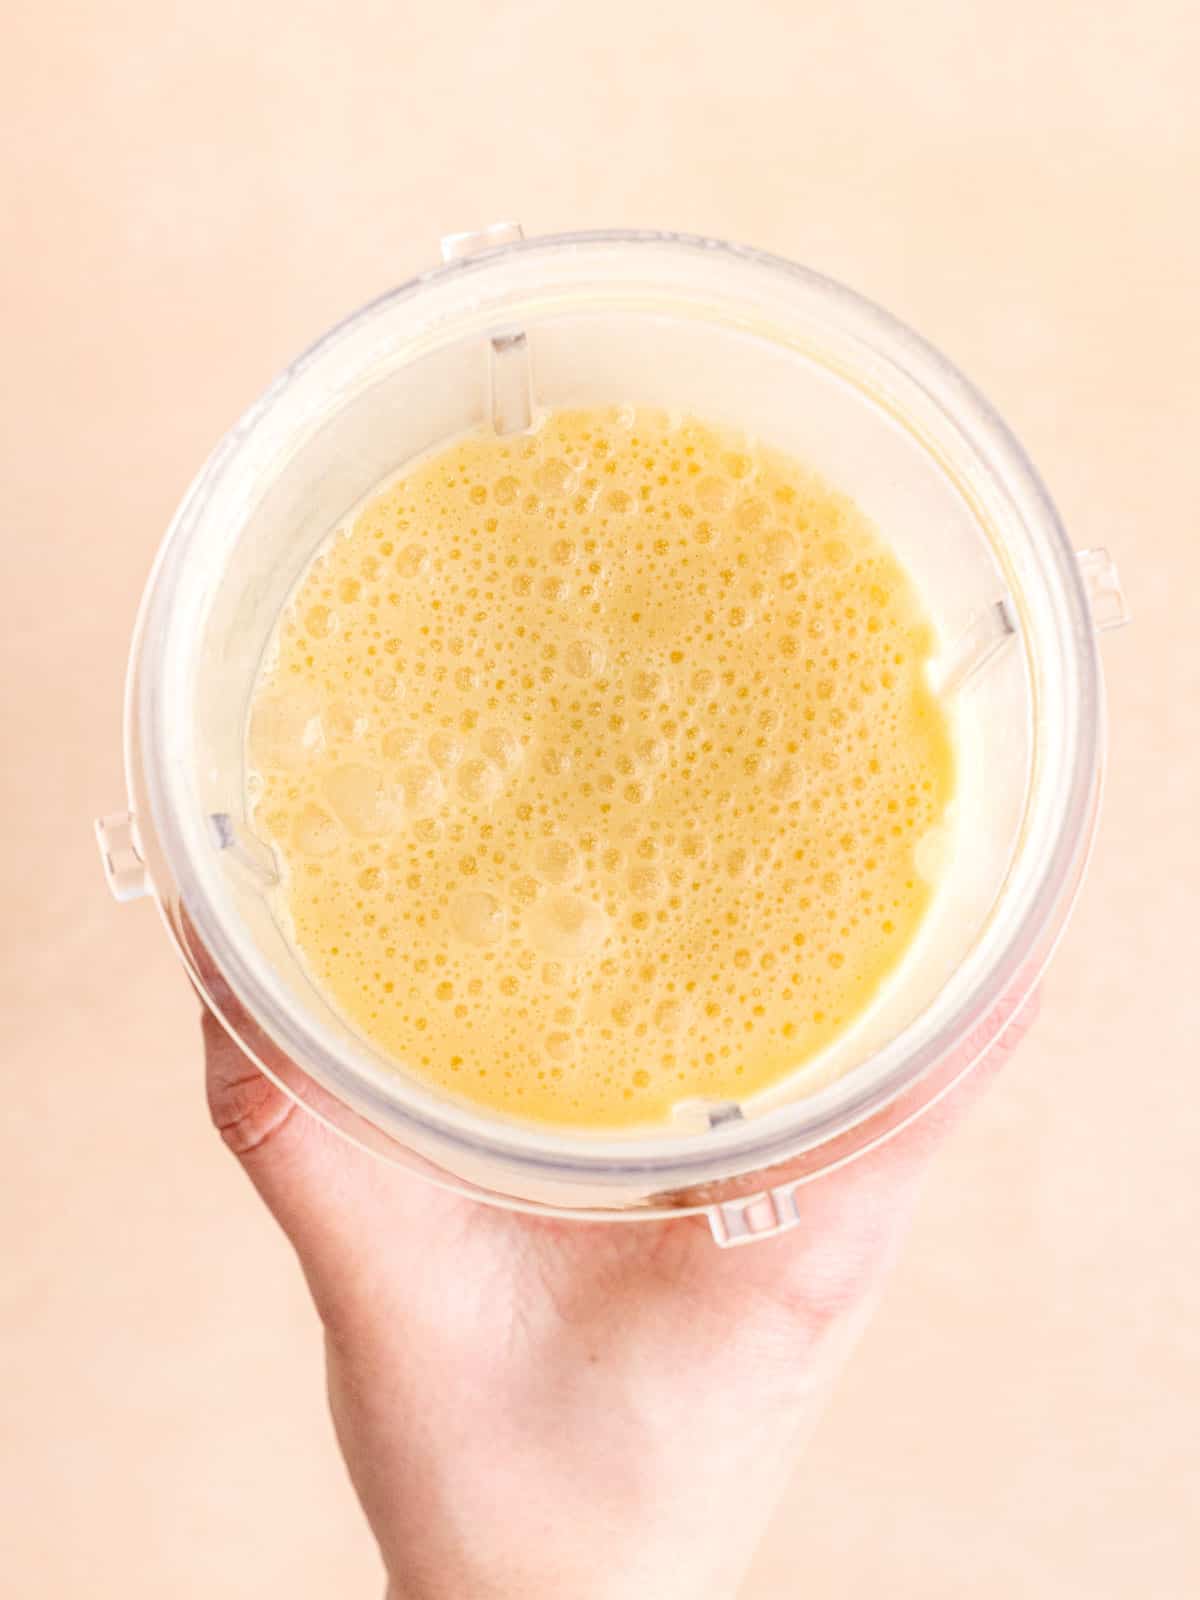
Step 3: To make the custard, mix together the eggs, granulated sugar, all purpose flour, melted and slightly cooled butter, buttermilk, vanilla extract, lemon juice, and salt.

Step 4: Sprinkle chopped pear slices and halved raspberries evenly across the cooled cookie crust.
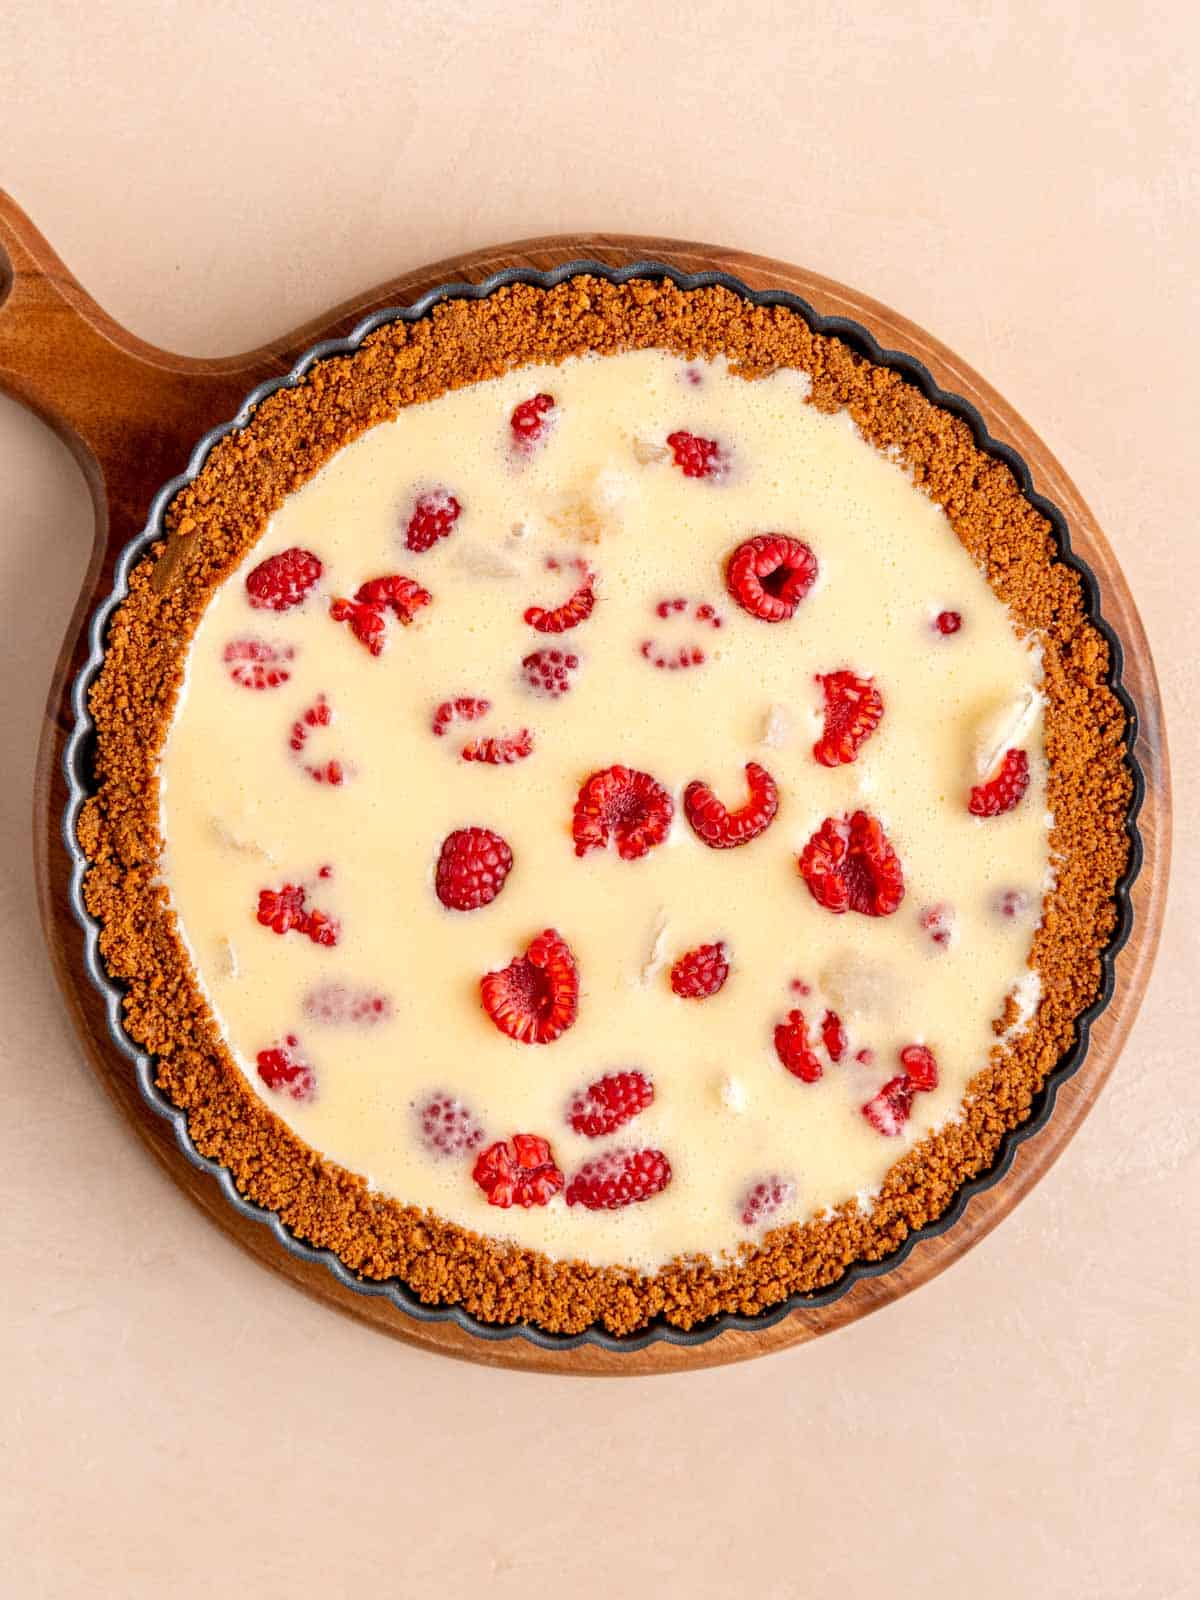
Step 5: Pour the custard batter over the fruit in the tart shell. Top with a few extra raspberries, if desired.
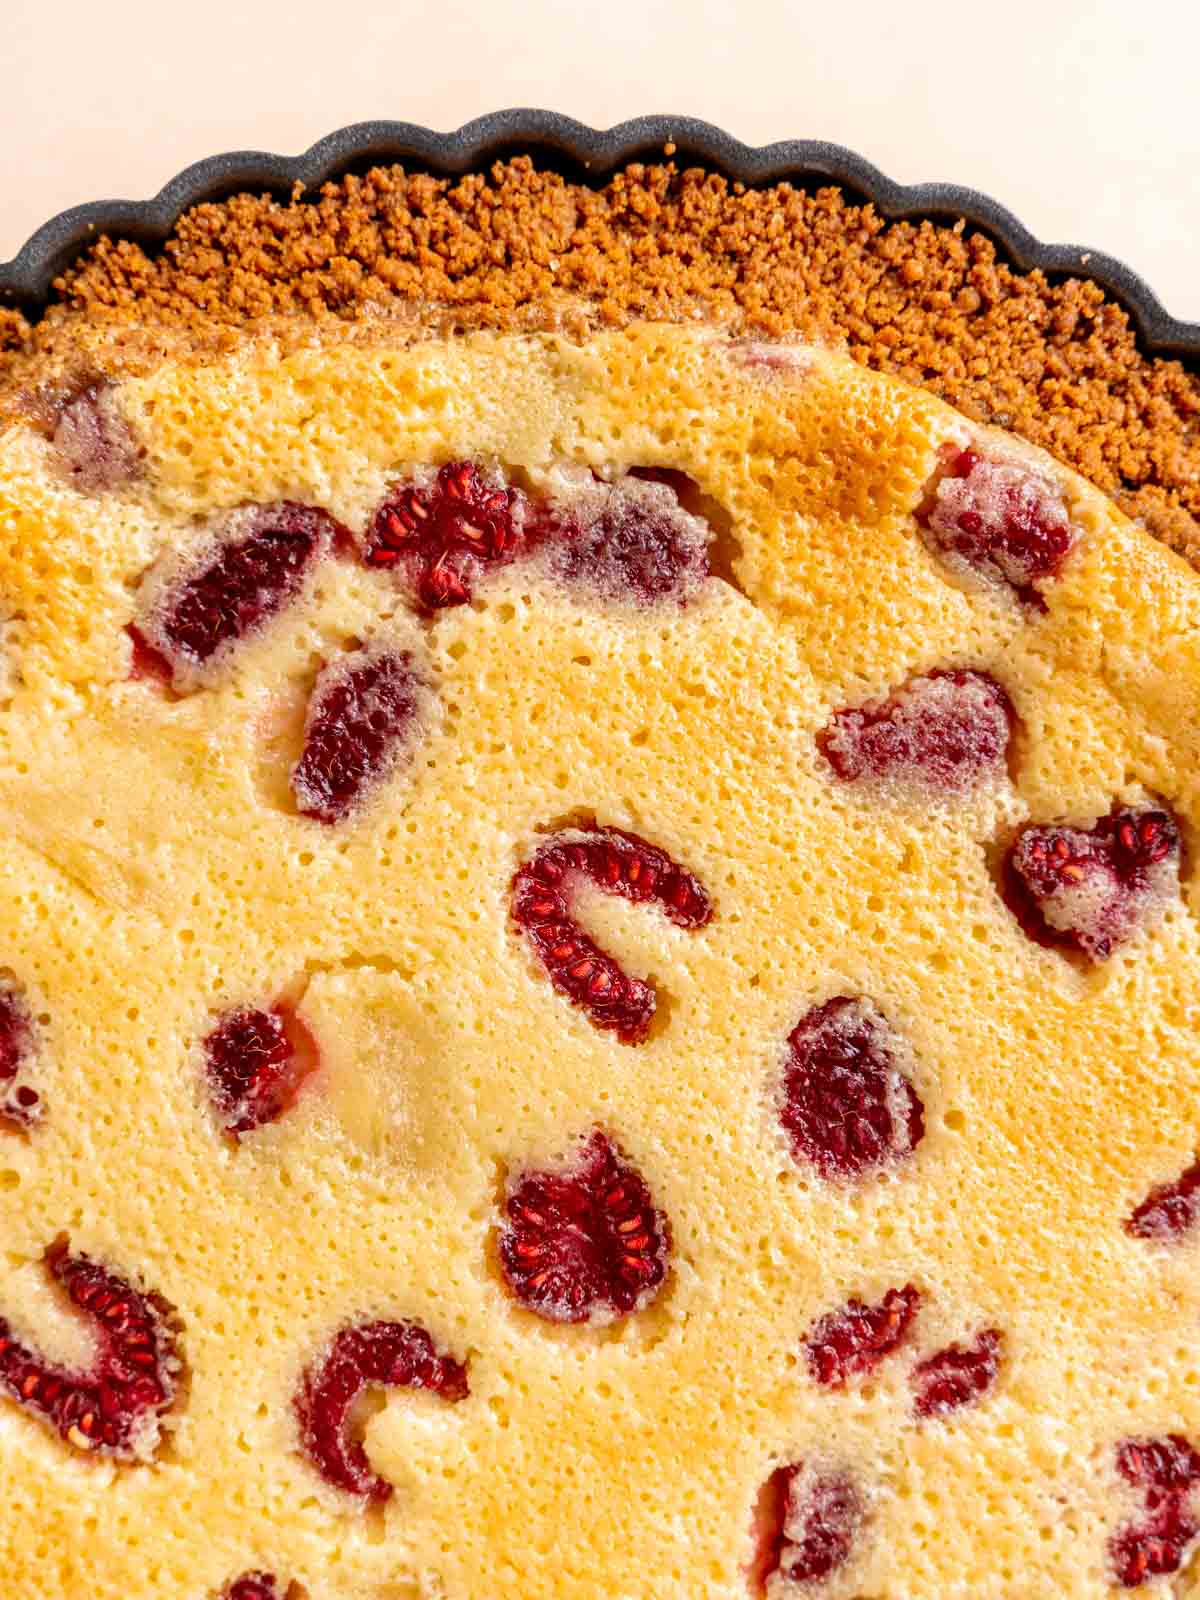
Step 6: Bake the buttermilk tart at 350°F until the top is golden, about 50-65 minutes. Turn the oven off and leave the tart in the oven for 10-20 minutes longer. Then, remove from the oven and allow to cool completely.
Expert Baking Tips
- I like to use the bottom of a measuring cup or small glass to help press the cookie crust into the tart pan. It helps get the crust even and create smooth edges.
- You can use a whisk to make the buttermilk filling, or you can place all of the ingredients in a blender or use an electric hand mixer to combine - whichever you prefer!
- Place a baking sheet on the oven rack underneath the tart pan to catch any leaks when the buttermilk pie is baking.
Recipe FAQs
This fresh raspberry tart recipe has a cookie crumb crust that is baked in a tart pan rather than a pie plate. Tart pans have a 90-degree, often fluted edge versus a pie plate that angles out and often holds more volume of filling.
Since the buttermilk is such an important ingredient in this recipe, I do not recommend substituting it with anything else.
This could be from having it cool down too quickly. Leaving it in the oven after turning it off helps prevent this. Regardless, it will still be delicious!
Yes, but it may be more shallow or deep depending on the size of the pie pan.
Have extra raspberries to use up after making this recipe? Give my chocolate raspberry brownies a try!
Storage
Refrigerator
The raspberry pear tart can be stored in an airtight container for 5 days. However, it's best enjoyed within 1-2 days.
Freezing Instructions
Store cooled and sliced buttermilk tart in a freezer-safe airtight container for up to 1 month.


Did you try this recipe?
Leave a ⭐️ review below and tag @brokenovenbaking on Instagram & Facebook!
📖 Recipe
Pear and Raspberry Buttermilk Tart
Equipment
- 9-inch tart pan
- Blender and/or food processor
- Measuring spoons
Ingredients
Biscoff Cookie Crust
- 32 whole (250 g) Biscoff cookies 1 8.8oz package
- 1 tablespoon (12 g) granulated sugar
- 6 tablespoons (84 g) unsalted butter measured, melted, then cooled
Pear and Raspberry Buttermilk Tart Filling
- 2 large eggs room temperature
- 1 cup (200 g) granulated sugar
- 2 tablespoons (15 g) all-purpose flour
- ⅛ teaspoon salt
- 6 tablespoons (84 g) unsalted butter measured, melted, then cooled
- ¾ cup (177.44 ml) buttermilk room temperature
- 1 teaspoon vanilla extract
- 2 teaspoons lemon juice
- ½ cup raspberries cut in half
- ½ cup canned sliced pears (no sugar added) drained and diced
Instructions
Biscoff Cookie Crust
- Preheat oven to 350°F. Place a baking tray on the oven rack below the middle rack (this is to catch any tart leakage, just in case!)
- Place cookies in a food processor and chop to crumbs. Add the sugar and melted butter and continue to pulse until it resembles wet sand.
- Firmly press the crumbs into a tart pan. I like to use the bottom of a glass or measuring cup to press along the edges and bottom of the pan.
- Bake Biscoff cookie crust for 7 minutes, then let it cool. Keep the oven at 350°F for the tart.
Pear and Raspberry Buttermilk Tart
- Mix or blend the eggs, sugar, flour, salt, melted butter, buttermilk, vanilla extract, and lemon juice until well-combined.
- Place raspberry halves and diced pears on the bottom of the cooled tart crust. Pour the filling over the fruit so that it fills the crust. Add a few extra raspberries on top (optional).
- Bake on the middle rack until the top is puffy and lightly golden (about 50-65 minutes). Turn the oven off, but keep the tart in the oven for 10-20 minutes. Then, move it to a wire rack to cool.
Comments
No Comments