

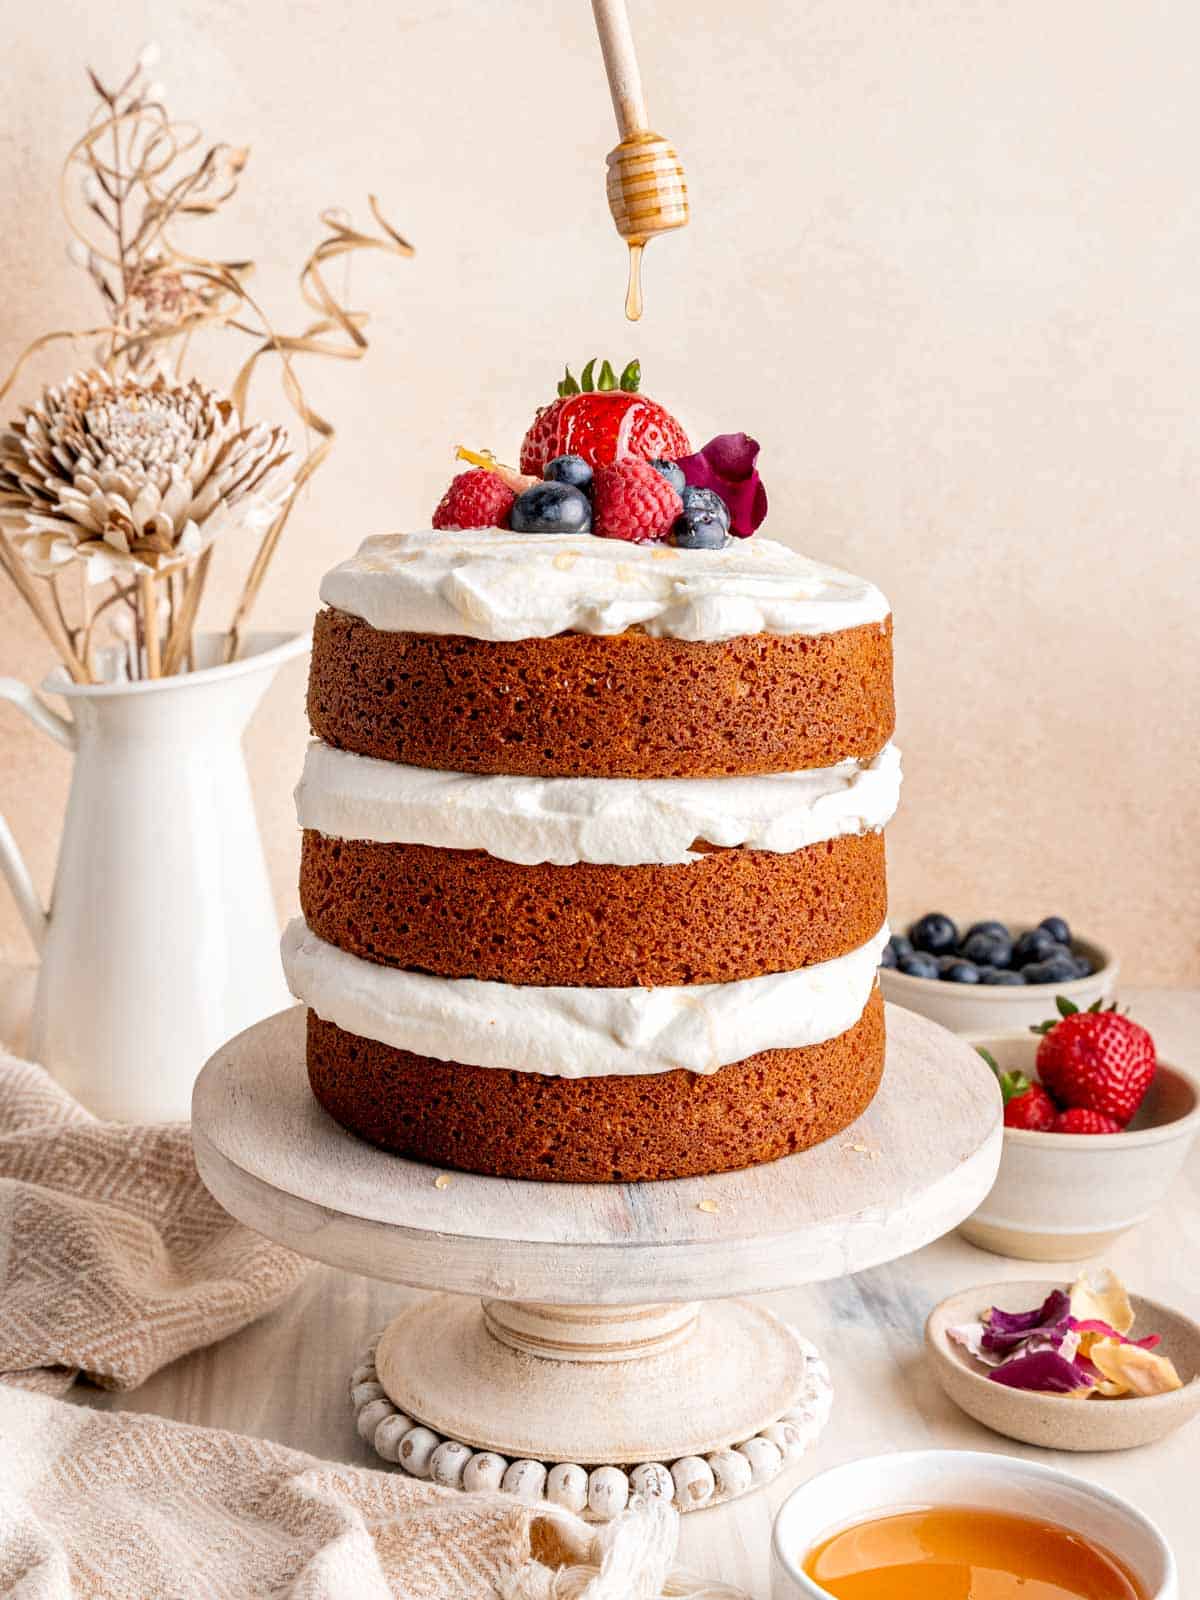
This Honey Vanilla Cake recipe is 3 delicious honey flavored sponges layered with homemade vanilla whipped cream! It's so easy to whip up in less than an hour, and it's the perfect size for small gatherings. Top it with fresh fruit and it's the best sweet treat in the summer!
Save This Recipe! 💌
Have you ever sweetened a cake using honey? I can't believe it's taken me this long to try it! This simple layer cake has a subtle honey flavor that pairs so well with the light and refreshing whipped cream!
I've also made mini muffins with honey and they're just as tasty!
Jump to:
Why We Love This Recipe
- It's an incredibly simple layer cake that doesn't require any freezing or crumb coating!
- The honey flavor is delicate and delicious in every bite!
- This delicious honey cake is layered with lightly sweetened whipped cream and topped with natural berries, so the whole cake isn't overly sweet.
- If you prefer individual cakes for all, it can be made into honey vanilla cupcakes as well!
- It's less sweet but just as delicious as my Almond Cupcakes with Raspberry Frosting!
- It uses basic ingredients - no cake flour needed!
- This cake is so good topped with fresh summer fruit. If you have extra fruit leftover, you should try my fruit pizza cookies!
Ingredients
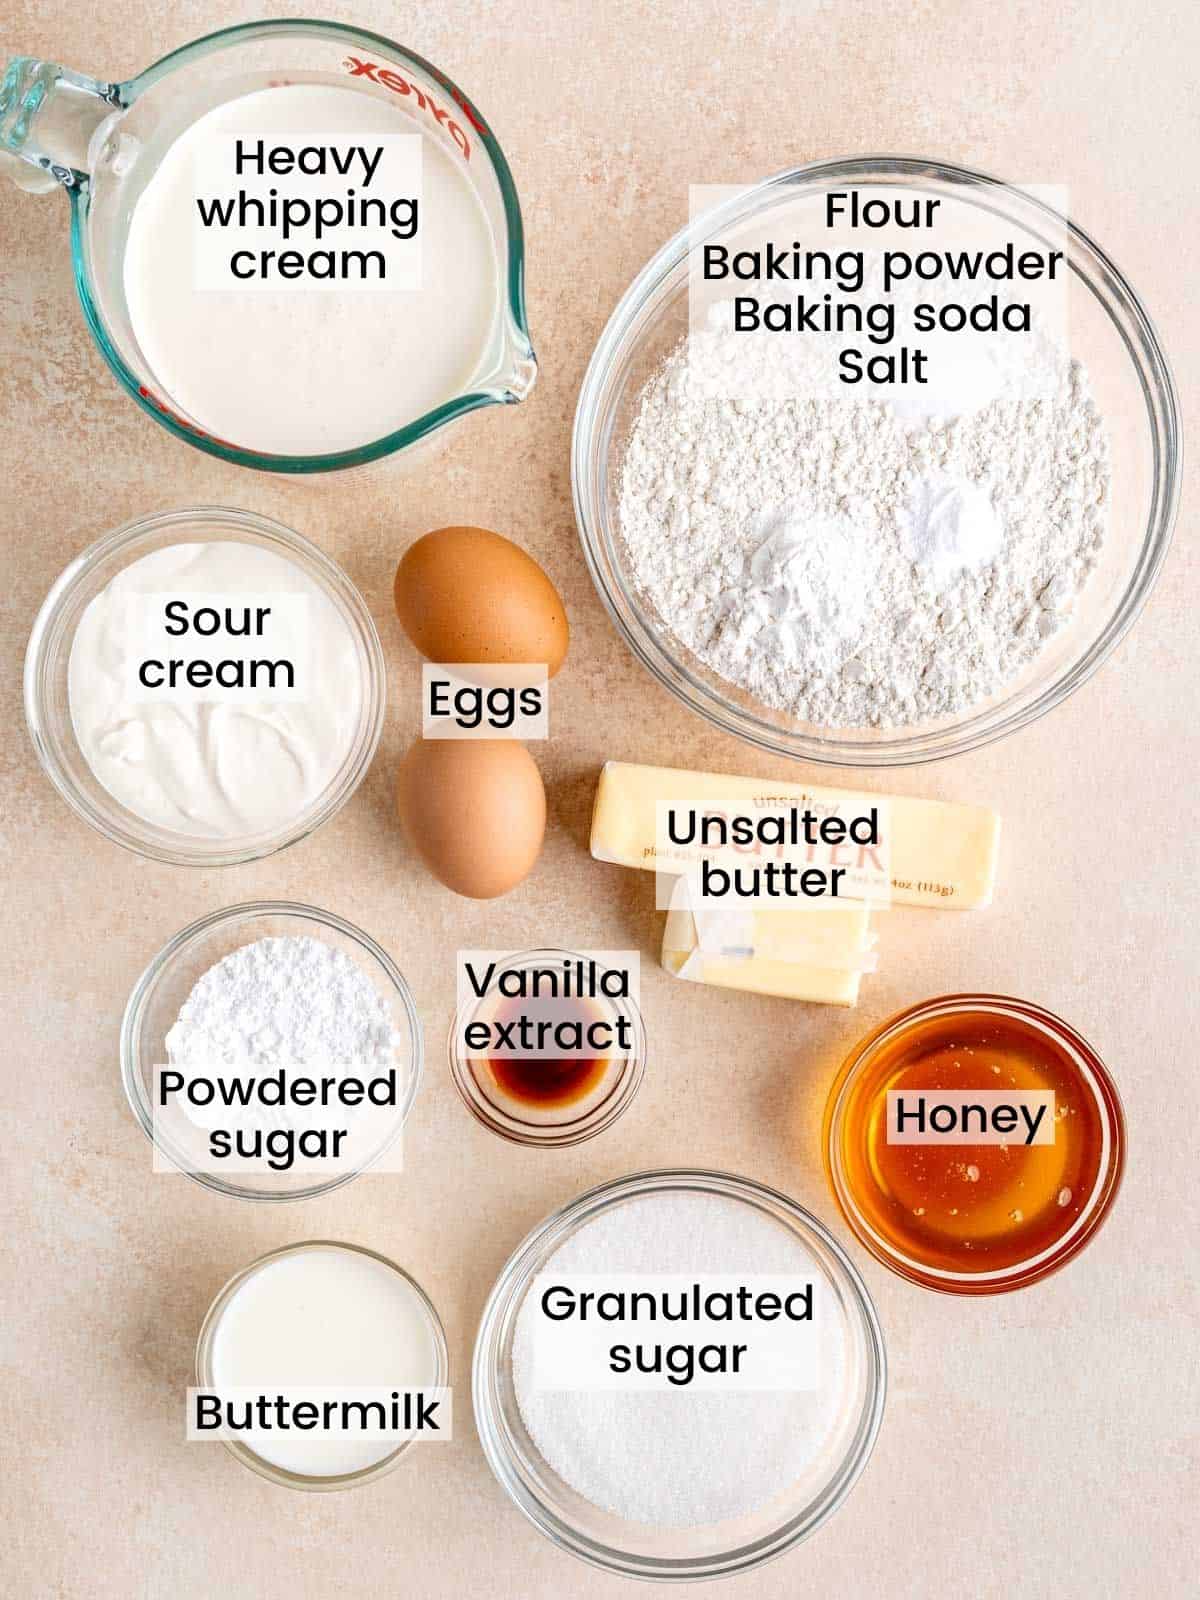
- All purpose flour
- Baking powder
- Baking soda
- Salt
- Unsalted butter
- Large eggs
- Vanilla extract
- Honey: I recommend using a local variety of honey to really hone in on specific flavor notes!
- Granulated sugar
- Buttermilk
- Sour cream
- Heavy whipping cream
- Powdered sugar
See recipe card below for quantities.
Substitutions & Variations
- For a sweeter cake, try using a vanilla buttercream frosting or a cream cheese frosting.
- Make it a honey almond cake by replacing the vanilla extract with ¼ teaspoon of almond extract and sprinkling with sliced and/or ground almonds!
- Add a teaspoon of lemon zest to the butter and sugar while making the batter for a citrusy flavor!
- Next time, turn the cake into 18 cupcakes! Use a large ice cream scoop to top them with whipped cream and then add summer berries and honey on the tops.
This recipe has not been tested with other substitutions or variations. If you replace or add any ingredients, please let us know how it turned out in the comments below!
Equipment
You'll only need some basic baking tools to make this vanilla honey cake recipe!
- 3 6-inch round cake pans
- Parchment paper rounds (or cut your own from a roll)
- An electric hand mixer or stand mixer
- A cooling rack
Step by Step Instructions
Before you get started, preheat your oven to 350°F. Prepare your pans by lightly coating them with a non-stick spray and pressing a piece of parchment paper inside just so it covers the bottoms.
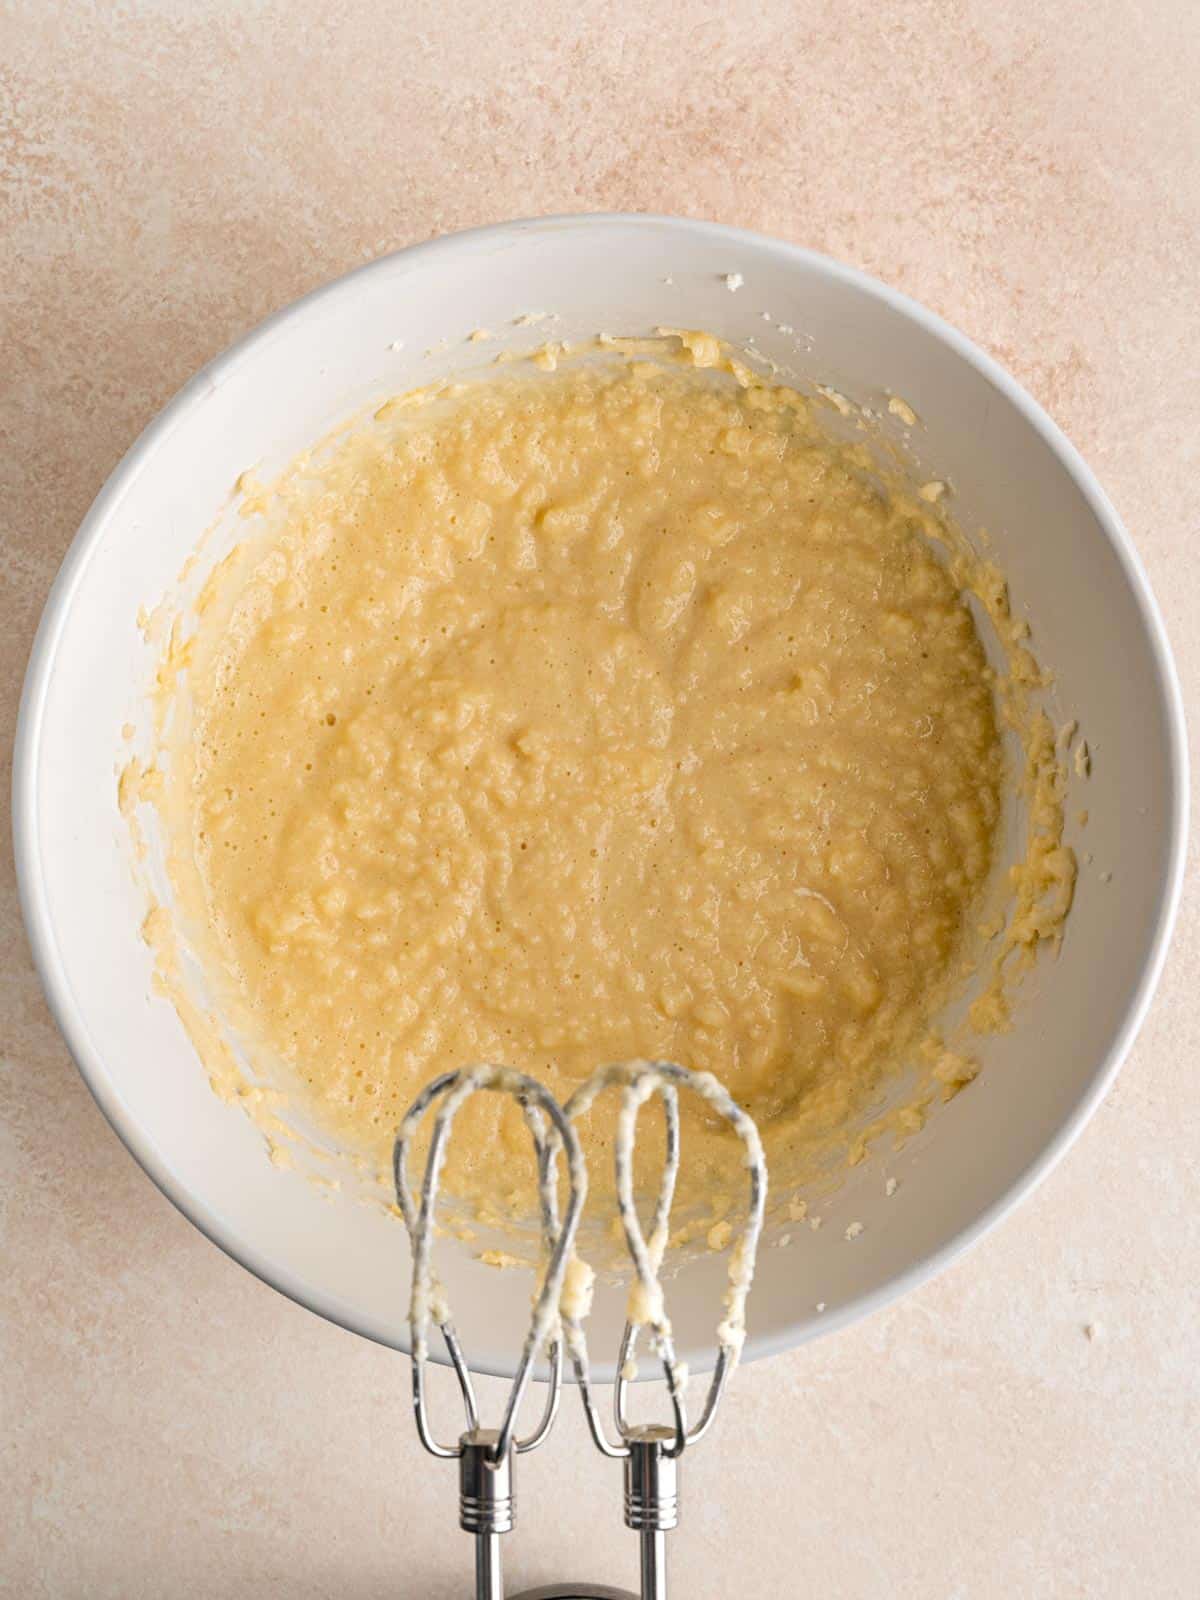
Step 1: Cream together the softened butter and sugar in a large mixing bowl with a hand mixer (or stand mixer with paddle attachment) on medium speed until light and fluffy. Mix in the honey, eggs, vanilla extract and sour cream.
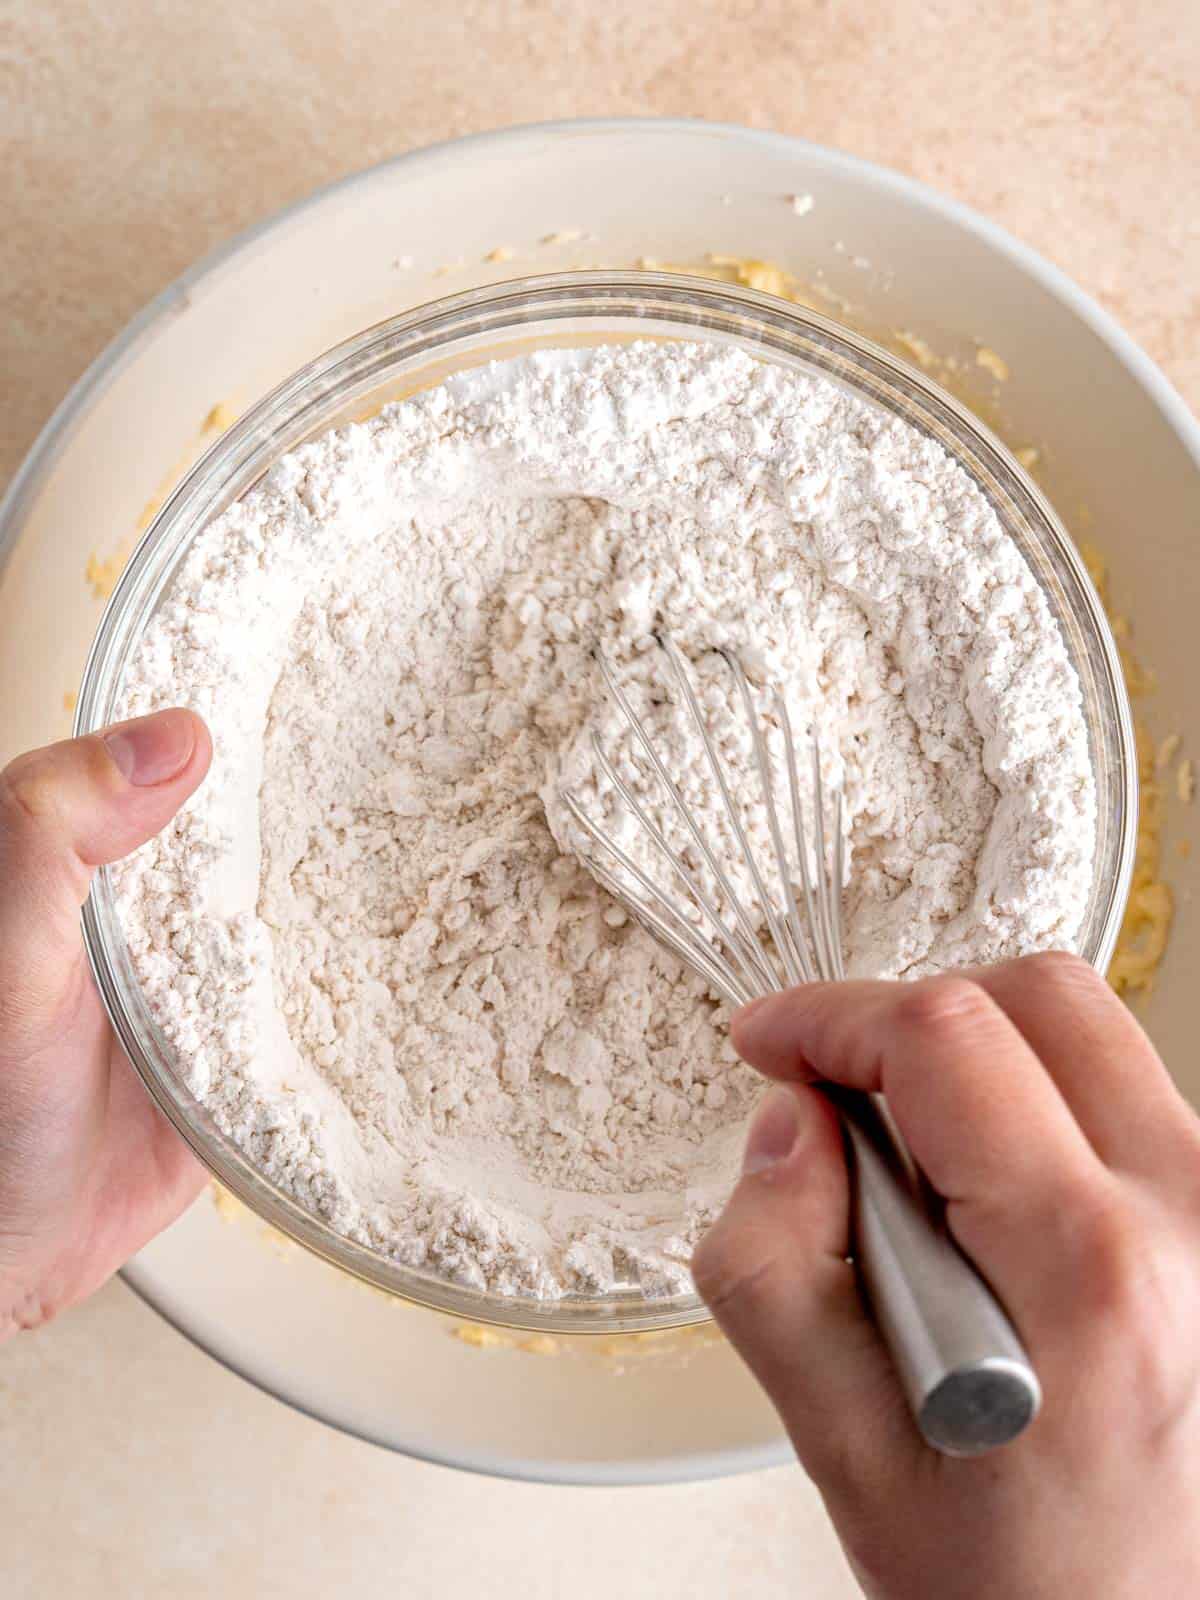
Step 2: Whisk together the dry ingredients - flour, baking powder, baking soda and salt - in a small bowl.
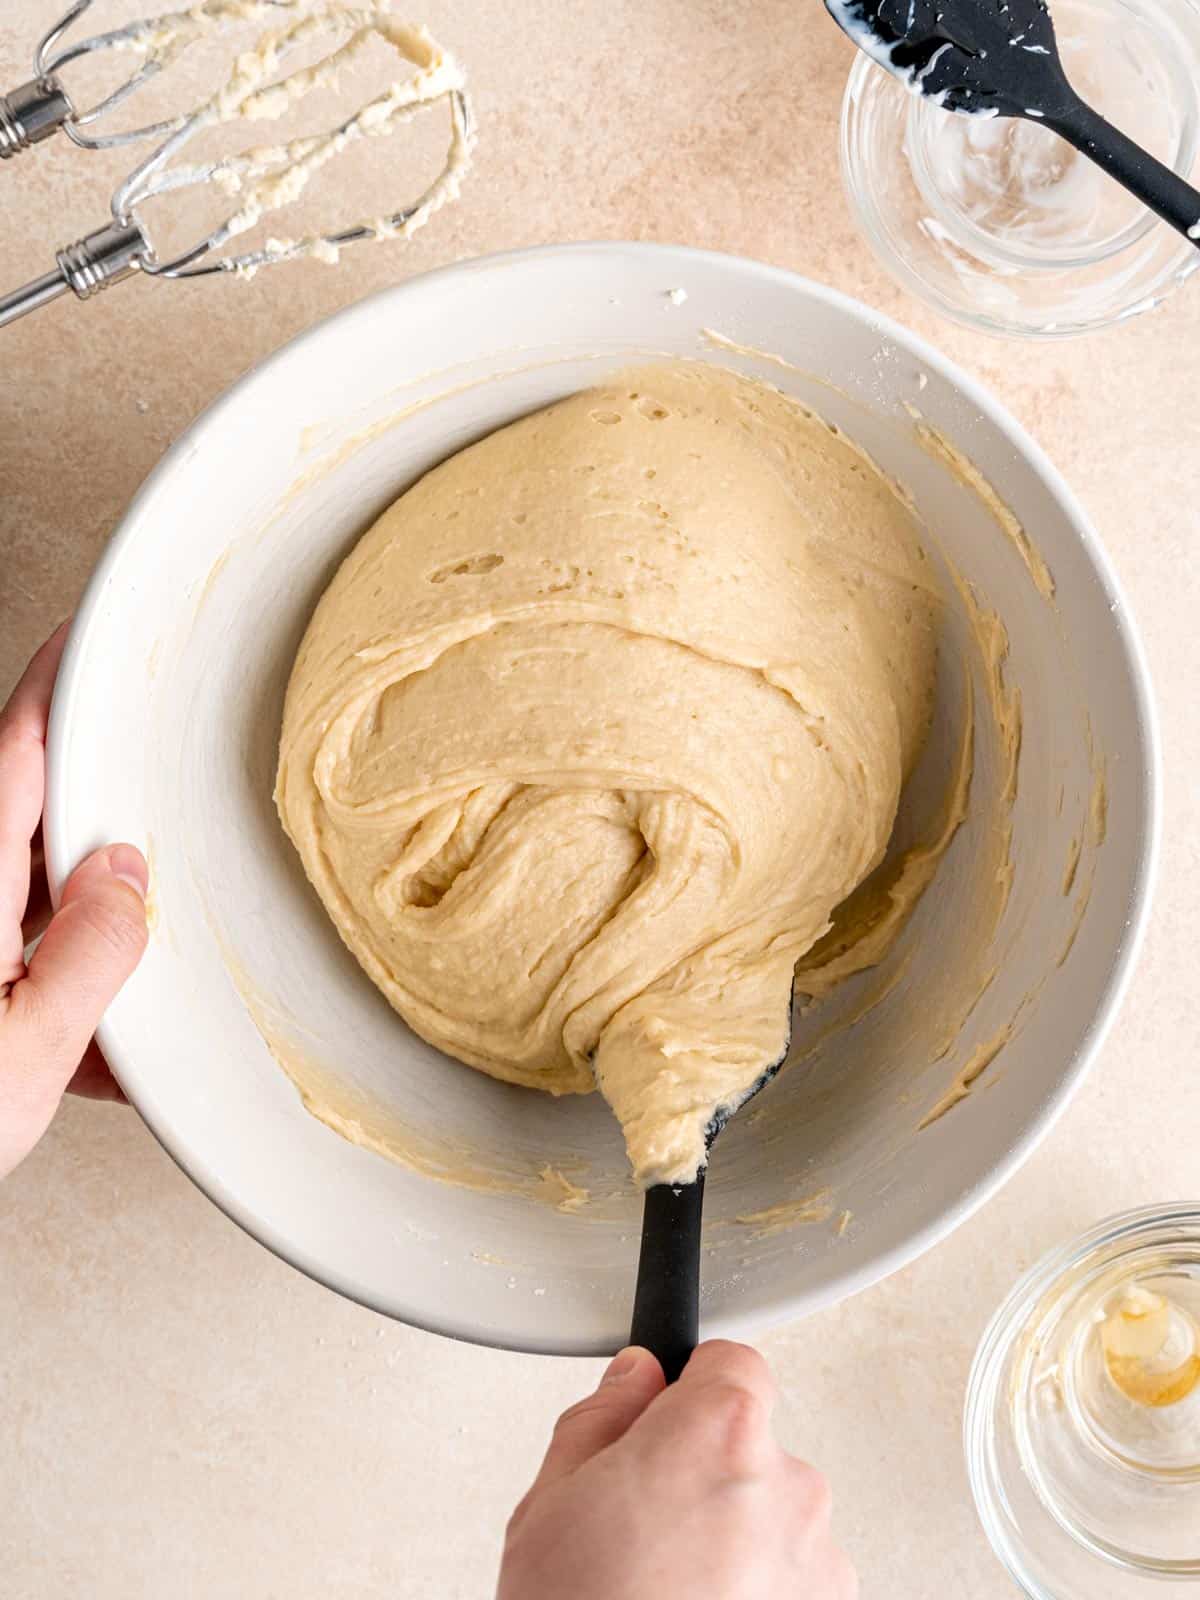
Step 3: Alternately fold a third of the flour mixture and buttermilk at a time into the wet ingredients just until everything is combined.
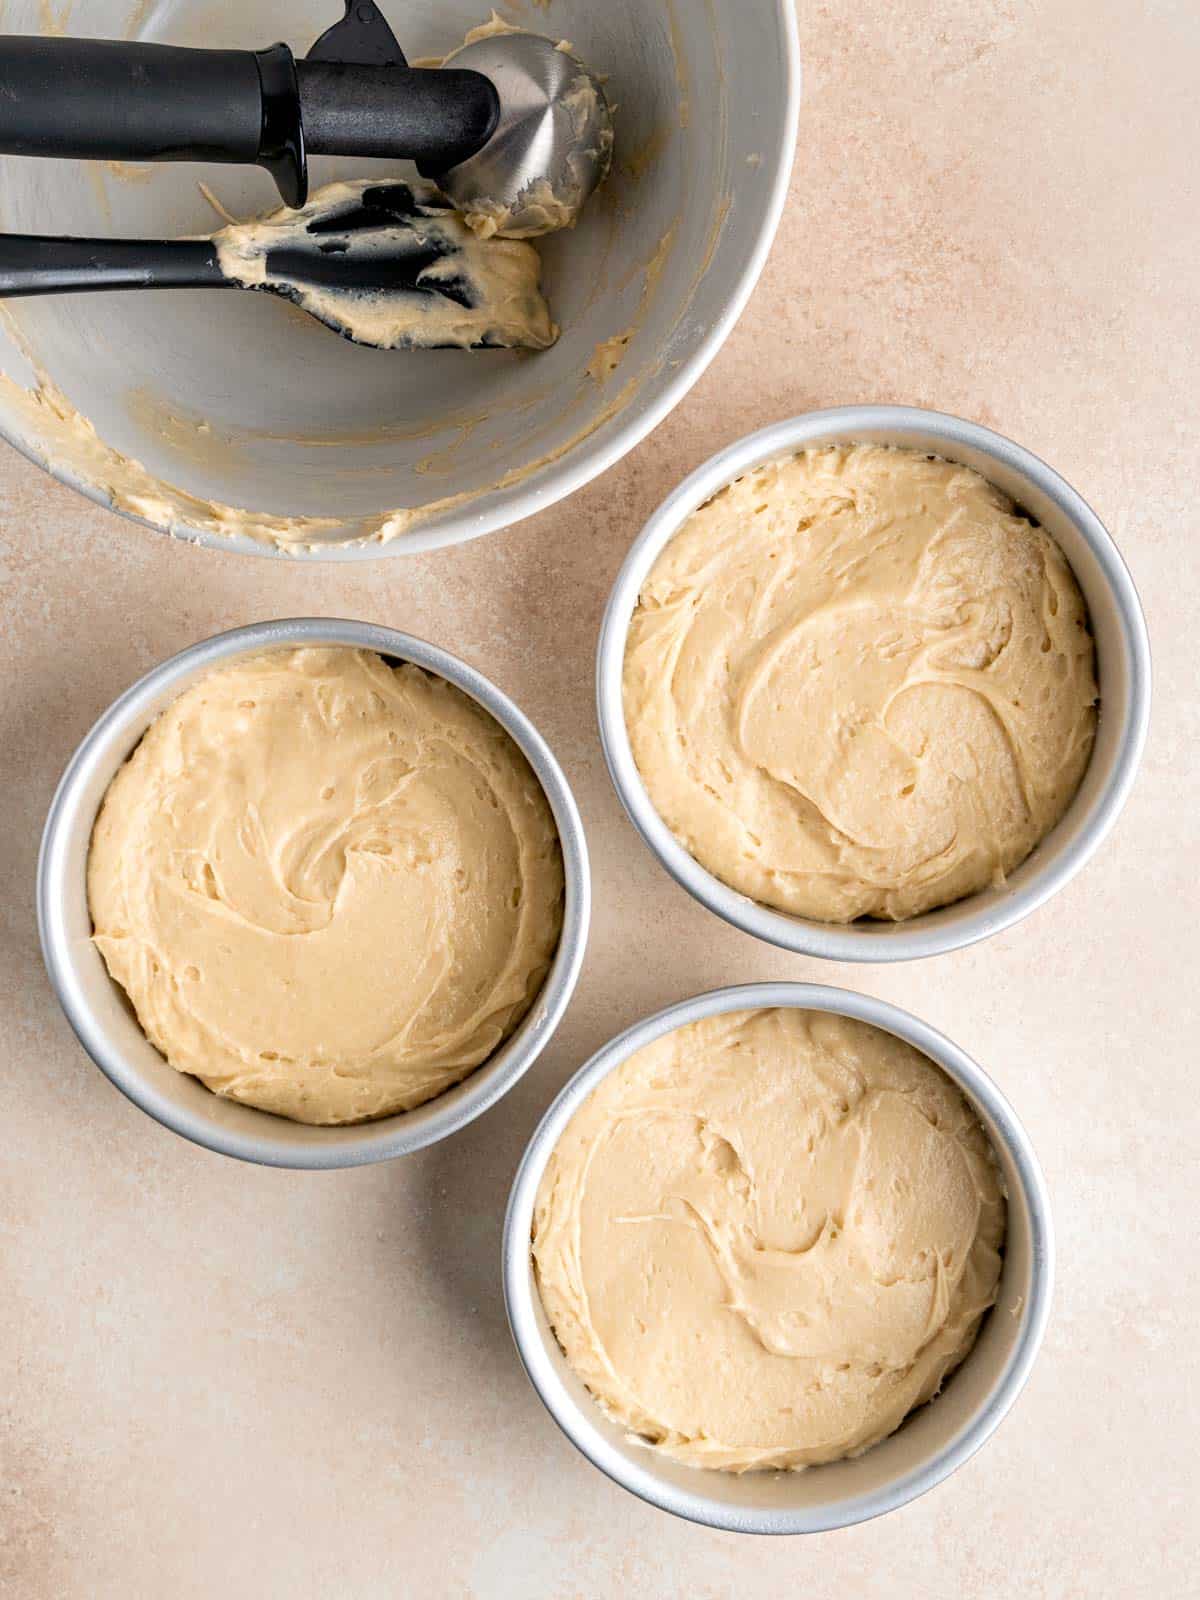
Step 4: Evenly distribute the cake batter across the prepared pans and bake, all on the middle oven rack, until a toothpick comes out clean (about 25 minutes). Let the cakes cool in the pans and then carefully flip them out, peel the parchment off, and place them on a wire rack.
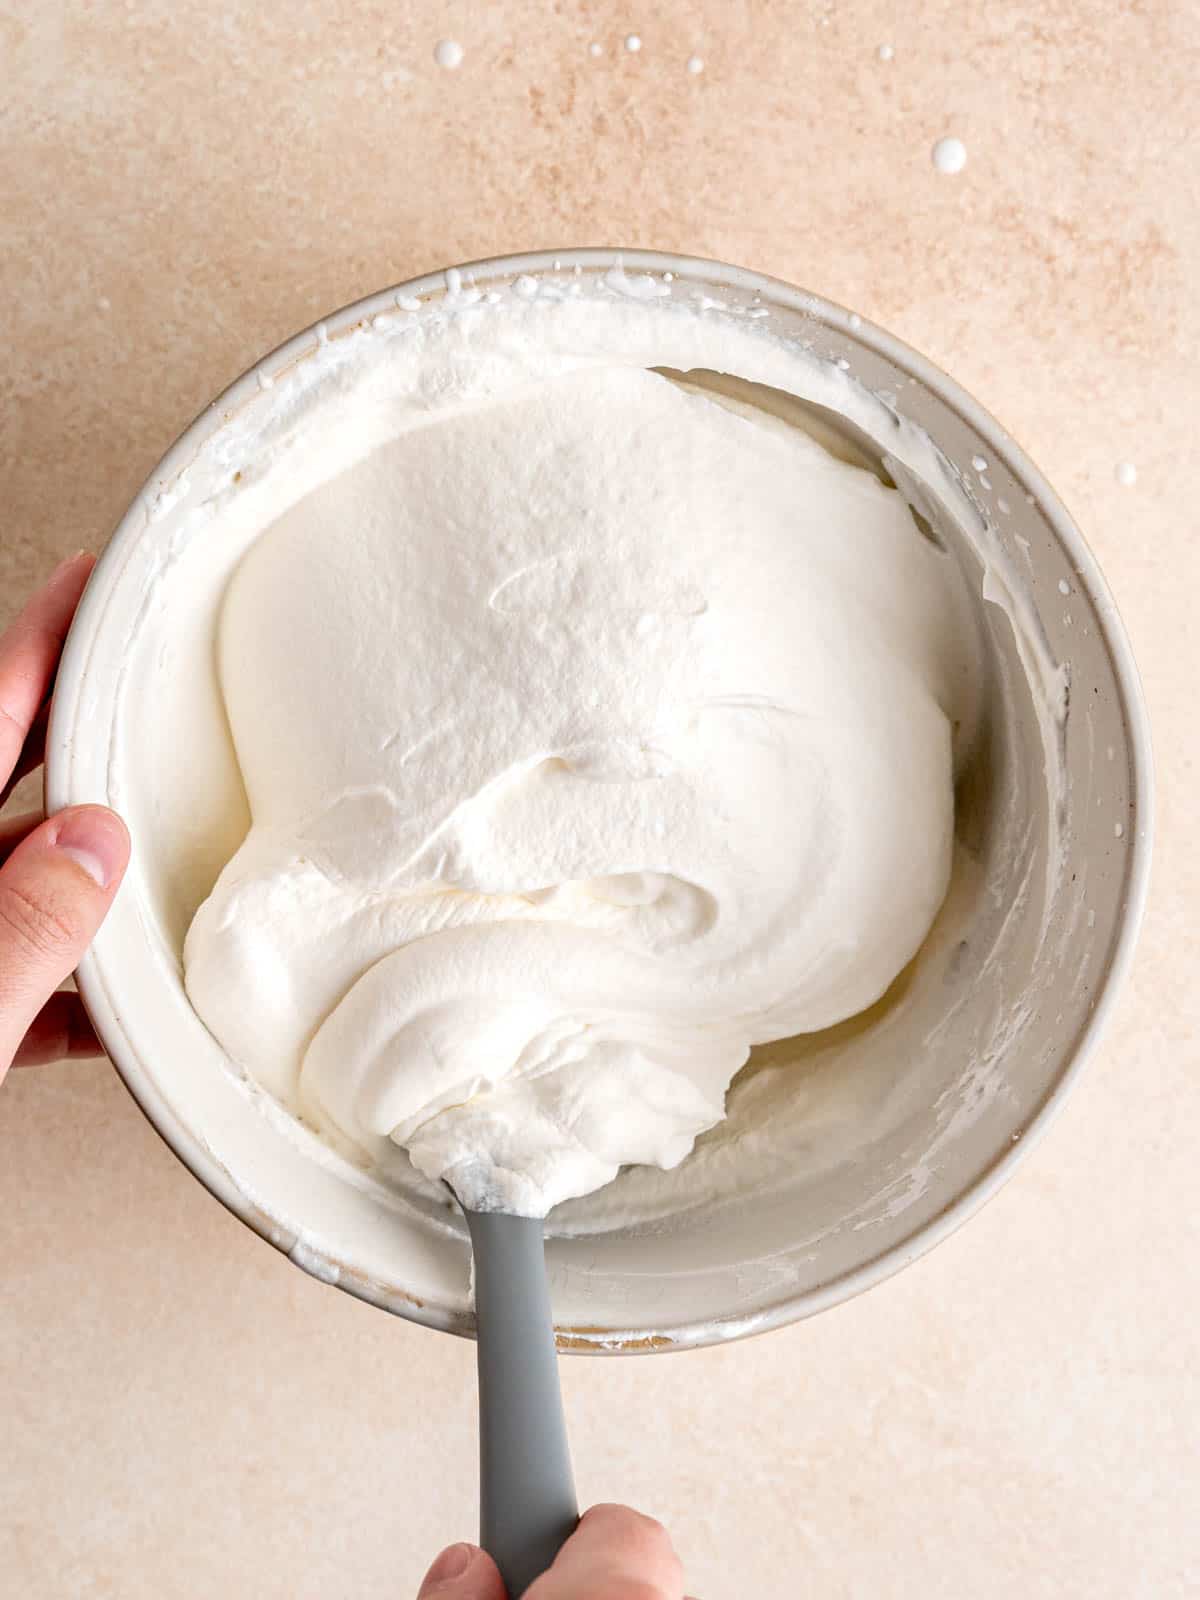
Step 5: While the cakes are cooling, make the whipped cream. In a medium bowl, whisk the heavy cream until it thickens, add the vanilla extract and powdered sugar and continue whisking until it reaches stiff peaks. This is easiest and quickest using a mixer but can be done by hand!
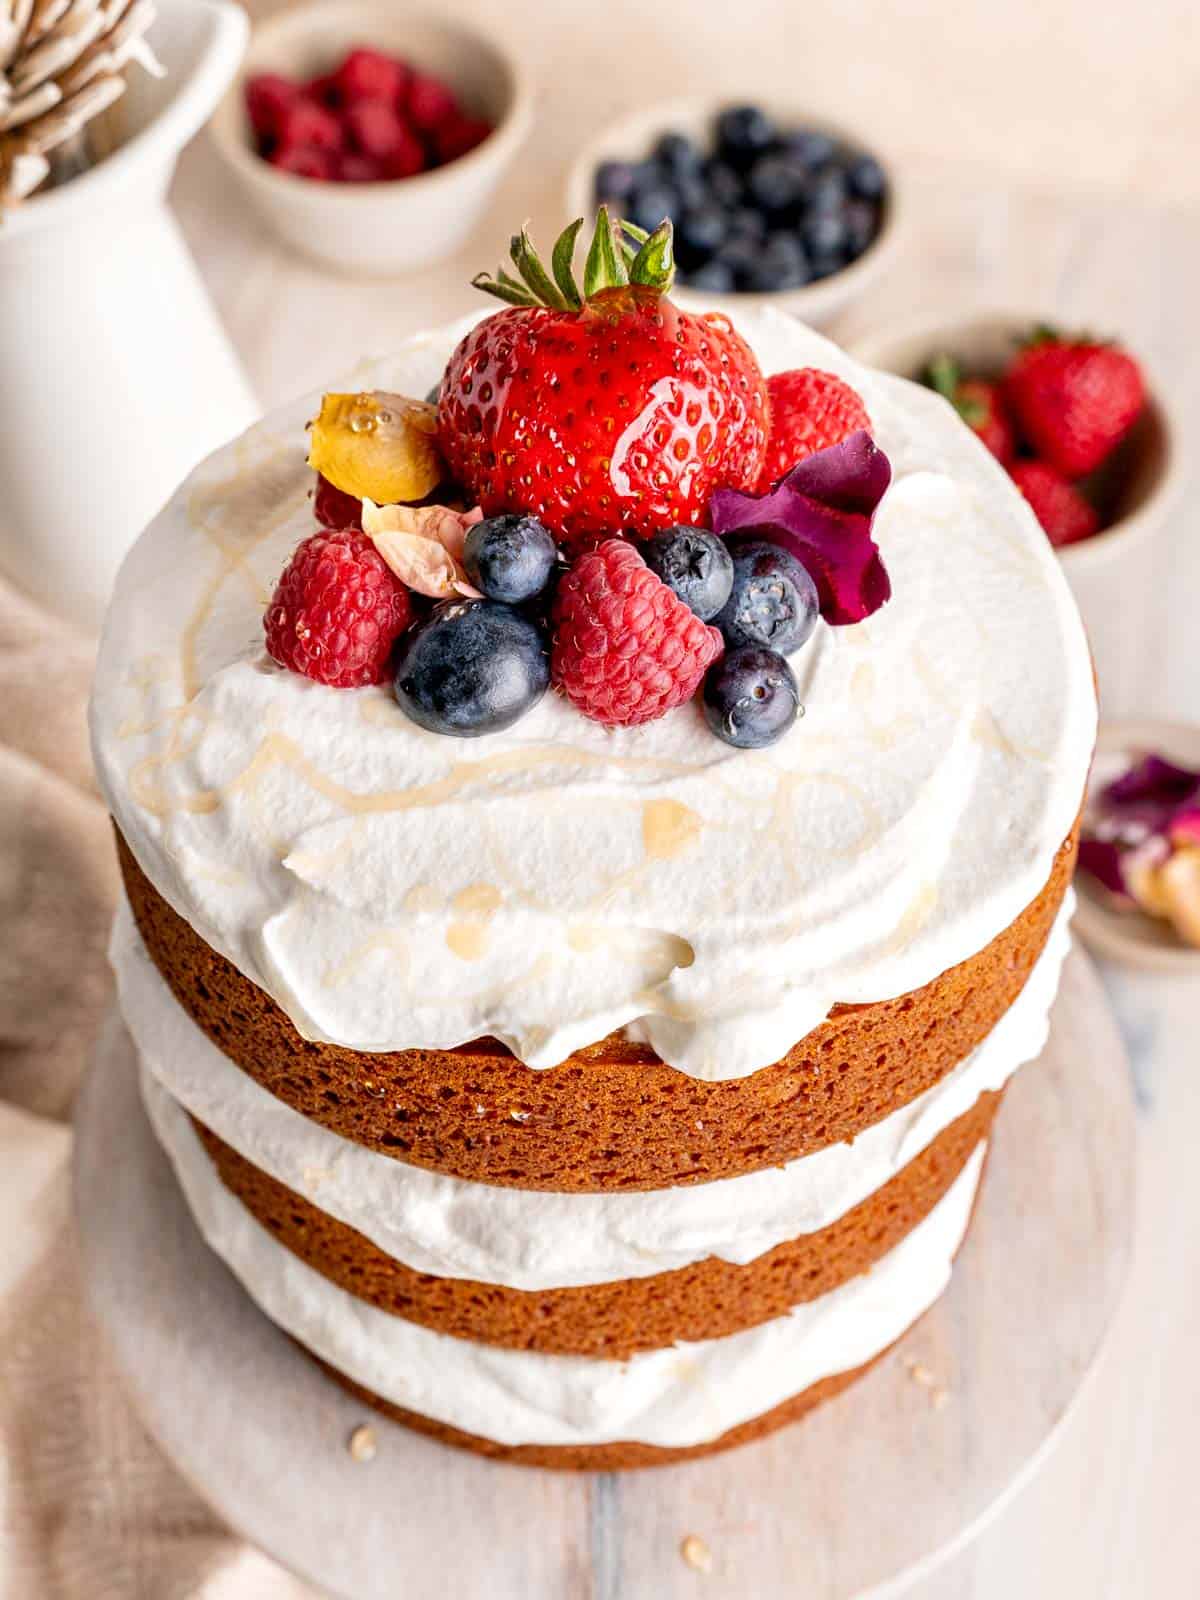
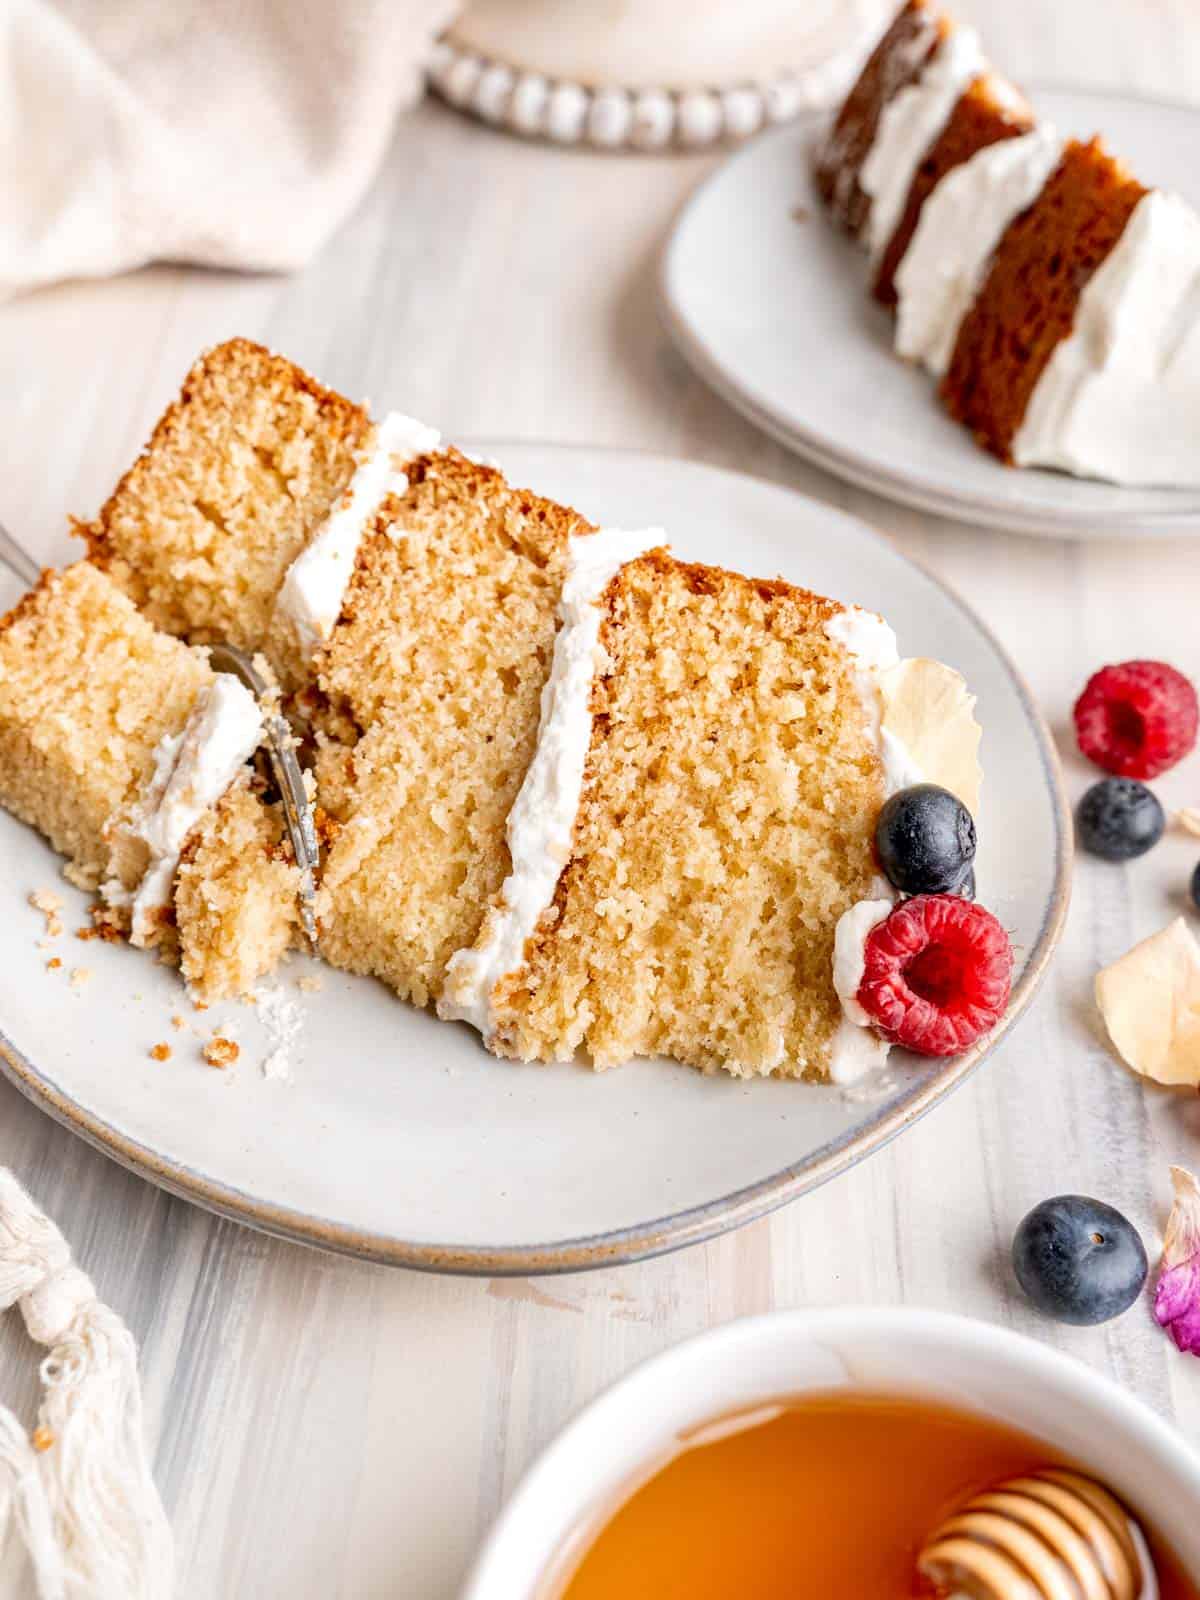
Step 6: Assemble the cake by spreading whipped cream on the completely cool cake layers with an offset spatula. Garnish with your favorite fruits, edible flowers and extra honey!
Expert Tips
- Use local honey! Did you know raw honey looks and tastes different depending on where it's from? Its flavor can range from citrusy to floral based on the pollen in the area. If you make this cake using locally sourced honey, it'll bring out the flavor profile of that specific honey. I like to decorate this cake to match the honey's taste. I used honey with floral notes in this cake, so I topped it with edible flowers! It also pairs extremely well with fresh berries!
- Make sure the cakes have cooled to room temperature before frosting. If you add the whipped cream while the cakes are even still slightly warm, the cream can melt and then you'll have a droopy cake. It's also important not to keep the assembled cake in heat for very long.
- Use a scale to weigh your flour. It tends to get packed into measuring cups, so this is the best way to ensure an accurate measurement and a fluffy, moist cake. Grams can be found by switching over to "Metric" in the recipe card below.
Recipe FAQs
While you can definitely taste the honey in the cake layers, it isn't a super strong flavor.
Sure you can! Microwave it for a few seconds until it's liquidized and then measure it out.
Storage
Room Temperature: The cake layers can be wrapped and stored at room temperature for a couple of days before assembling the honey vanilla cake.
Refrigerator: The whipped cream and assembled cake should be stored in the fridge for up to 3 days.
Freezing Instructions: Individually wrap the cooled cake layers in plastic wrap and freeze for up to 1 month. When ready to serve, let the cakes thaw at room temperature and make the whipped cream.


📖 Recipe

Simple Honey Vanilla Layer Cake
Equipment
- (3) 6-inch round cake pans
- Mixing bowls
- Measuring spoons
- Measuring cups/scale
- Whisk
- Spatula
- Hand mixer or stand mixer with paddle attachment (recommended)
- Wire rack
Ingredients
Honey Cake
- ¾ cup (1½ sticks) (169 g) unsalted butter room temperature
- ¾ cup (150 g) granulated sugar
- 6 tablespoons (6 tablespoons) honey
- 2 large (2 large) eggs room temperature
- 1½ teaspoons (1½ teaspoons) vanilla extract
- ½ cup (120 g) sour cream room temperature
- 2 cups (250 g) all-purpose flour
- ½ teaspoon (½ teaspoon) baking soda
- 1½ teaspoon (1½ teaspoon) baking powder
- ½ teaspoon (½ teaspoon) salt
- ¼ cup (59.15 ml) buttermilk room temperature
*see notes below to make your own
Whipped Cream
- 2 cups (473.18 ml) heavy whipping cream cold
- 1 teaspoon (1 teaspoon) vanilla extract
- 2 tablespoons (16 g) powdered sugar
Instructions
Honey Cake
- Preheat oven to 350°F. Spray three 6-inch round cake pans with cooking spray and line the bottoms with round sheets of parchment paper.
- In a large bowl, cream together the softened butter and sugar until light and creamy (about 2 minutes). One at a time: stir in the honey, eggs, vanilla, and sour cream (mixing after each addition).
- In a medium bowl, whisk together the flour, baking soda, baking powder, and salt.
- Slowly mix ⅓ of the dry ingredients into the wet ingredients, followed by ⅓ of the buttermilk. Repeat until all of the dry ingredients and buttermilk are incorporated into the batter. Be careful not to overmix - stop stirring as soon as everything is combined.
- Evenly distribute the cake batter into the 3 cake pans and smooth the tops out as much as possible with a spatula.
- Bake all 3 cakes on the middle shelf for 23-29 minutes. You may want to rotate the pans halfway through if they aren't baking evenly. They're done when the tops are light brown and a toothpick inserted into the middle comes out clean.
- Let the cakes cool in the pans for about 30 minutes and then carefully flip them onto a wire rack to finish cooling. While they're cooling, make the whipped cream.
Whipped Cream
- Whisk the heavy whipping cream vigorously until they've reached soft peaks (thick enough to hold together but droop when you lift the whisk). Add the vanilla and powdered sugar, and continue whisking to stiff peaks (thick enough to hold together and remain stable when you lift the whisk).
Assemble the Cake
- Alternately layer the honey cakes with the whipped cream.
- Decorate the cake however you'd like or leave it plain. I recommend adding a bit of fresh fruit!
I made a variation on this for my belated birthday with gluten free replacement flour, and added a tablespoon of cinnamon + half a tablespoon of cardamom because I thought they'd compliment the honey well. ...To be frank, I've been having a really rough month, but the cake came out so beautifully that it sort of saved the end of the year for me. Thank you so much for sharing the recipe!
Aw I'm so happy it helped brighten up your year! Happy belated birthday and cheers to a better 2026!! ❤️
Hello,
I’ve been wanting to make a toasted sesame honey cake. Could I substitute some of the flour for a bit of toasted sesame flour? Also, can this be converted to a two tier- 9 inch cake?
Hi Natalie! I've never baked with sesame flour so I'm not sure how it'd turn out, but I'd love to hear how it goes if you try it! Also haven't tried the two 9-inch pans, but I think it should work! The layers might be shorter and take less time to bake.