

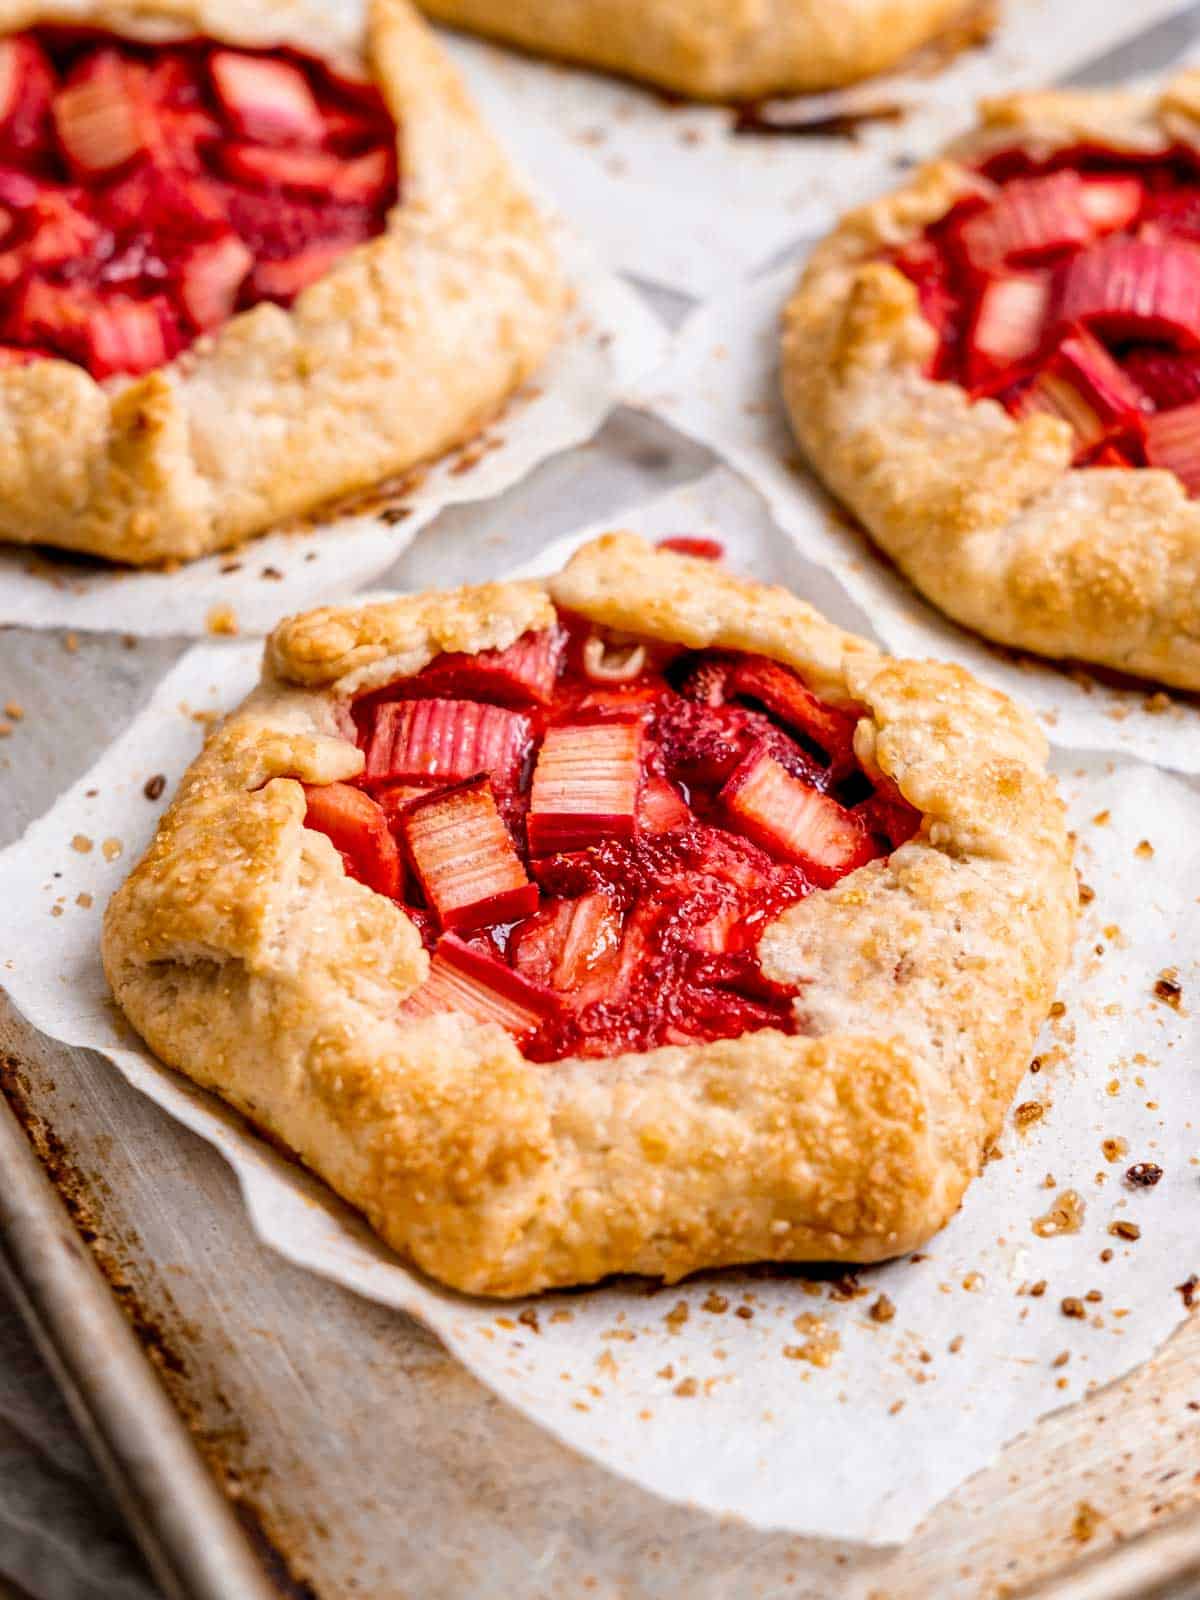
Rhubarb is finally back in season! What are you making with your supply? I'll be baking these Mini Strawberry Rhubarb Galettes! It's the best sweet and tart fruit combination! They have a homemade pie crust filled with a strawberry rhubarb filling, brushed with egg wash, and sprinkled with coarse sugar.
Save This Recipe! 💌
When I think of rhubarb, I think of my grandma's strawberry rhubarb jam! She always had her freezer stocked with jars and we ate through them so quickly! Another classic is strawberry rhubarb pie, which is similar to these, except galettes are a bit easier!
If you prefer an oat crunch over pie crust, give my strawberry rhubarb crisp recipe a try!
Jump to:
Why You'll Love This Recipe
- Strawberries and rhubarb make the perfect combination of sweet and tart!
- It's a great way to use spring rhubarb and summer strawberries.
- You can make them using fresh or frozen fruits, just like my mixed berry galette.
- Galettes are easier than pies because you don't have to worry about a top pie crust.
- It makes 4 rustic and beautiful desserts for everyone to enjoy!
Recipe Ingredients
You'll need the following ingredients to make these delicious Strawberry Rhubarb Galettes:

Ingredient Notes:
- Strawberries & rhubarb: You can use fresh or frozen fruit to make these galettes! I've started to stock up on rhubarb in the spring and freeze it so I can have it year-round. (Tip: wash & dry your fruit before freezing it!) Frozen strawberries can be found at most grocery stores at all times. If you do use frozen fruit for this, don't thaw it ahead of time.
- Sugar & lemon juice: Enhance and balance out the sweet & tartness of the fruits!
- Corn starch: This helps thicken the strawberry rhubarb filling so it holds together better in the galette crust.
- Flour, salt, sugar, ice water, cold butter: These ingredients make up your crust! You'll want to work quickly and keep it as cold as possible. I like to cut my butter into tablespoons and then freeze it for at least 20 minutes before adding it to the flour.
- Egg yolk & demerara sugar (optional but recommended): The egg wash gives the crust a golden color and helps the demerara sugar stick. I love the extra bit of sweetness and crunch the coarse sugar adds!
See recipe card below for a full list of ingredients and measurements.
Substitutions & Variations
- Mix and match different fruits for unlimited variations of this fruit galette!
- Don't feel like making pie dough from scratch? Use store-bought pie crusts instead.
- Add a scoop of vanilla ice cream, whipped cream, or your favorite toppings to the warm galettes!
This recipe has not been tested with other substitutions or variations. If you replace or add any ingredients, please let us know how it turned out in the comments below!
Equipment
- Food processor: The dough can be made by hand using a fork or pastry cutter, but I recommend using a food processor. This makes the dough process way easier and faster! You don't have to worry about flour and butter sticking to your hands or your body heat warming up the dough.
- Rolling pin & parchment paper: These tools are great for rolling out the dough! Parchment paper helps prevent sticking and makes transporting the galettes much easier!
How to Make Mini Strawberry Rhubarb Galettes

Step 1: Make the dough by pulsing the flour, salt, and sugar in a food processor. Add the cold butter and chop to combine. Gradually add ice water and chop until the dough starts to ball up.
See below for how to make the dough by hand.

Step 2: Form a ball with the dough and then flatten it onto a sheet of plastic wrap. Wrap it up and place it in the freezer for about an hour.
Once cold and firm, divide the dough into 4 equal pieces. Work with 1 piece at a time and keep the remaining ones in the refrigerator.

Step 3: Form a ball with a section of the dough, then flatten it on a piece of parchment paper. Place another parchment sheet on top of the flattened ball and roll it into a thin circle (about 8 inches in diameter) using a rolling pin.

Step 4: Add a few scoops of strawberry rhubarb filling to the center of the dough circle, leaving about an inch around the edge. Tightly fold the edges over the filling. Transfer the galette (with parchment) to a large baking sheet.
Repeat steps 3 and 4 until all four mini galettes are assembled and on the baking sheet. Place the galettes in the freezer while the oven preheats to 375°F.

Step 5: Once the dough is cold and firm, remove them from the freezer. Brush the egg wash over the edges.

Step 6: Sprinkle demerara or turbinado sugar over the egg wash. Place the galettes on the middle rack and bake until golden and bubbly.
Making Dough Without a Food Processor
If you don't have a food chopper or blender to make the pie dough with, you can make it by hand!
- Add the flour and chopped cold butter into a large bowl.
- Break up the butter into small, pea-sized pieces using a pastry cutter or fork. Make sure the butter pieces are coated in flour.
- Stir in the ice water 1 tablespoon at a time, using a spatula to mix. Once the dough starts to stick together, stop adding water.
- Follow steps 2-6 above.
Expert Baking Tips
- Slice and freeze your butter before getting started to make sure it's extra cold for the dough!
- Make sure your dough stays cold at all times! If you notice it getting too warm and melty, plop it in the freezer for a few minutes and come back to it once it's firm.
Common Questions
Rhubarb is typically in season during the spring. It can be found at some grocery stores in the produce section, or at your local farmers market.
When you pull these out of the oven, they're going to be bubbling and golden! My favorite way to eat them is by letting them rest for a few minutes and then adding a big scoop of vanilla ice cream on top while they're still warm! They're also delicious topped with whipped cream. These galettes can also be served cold, which is how my friends prefer to eat them.
Yes! This recipe includes an all-butter pie crust, but you can substitute 4 tablespoons of butter with an equal amount of cold shortening.

Storage
Refrigerator
Store strawberry rhubarb galettes in an airtight container in the refrigerator for about 5 days.
Freezing Instructions
These can be stored in a freezer-safe container for 1 month.
Reheating Instructions
These mini galettes can be enjoyed cold! However, if you prefer them warm, I recommend reheating the galettes in the microwave or a 350°F oven.


Did you try this recipe? Leave a ⭐️ rating below and share it on Instagram, Facebook, and Pinterest!
📖 Recipe

Mini Strawberry Rhubarb Galettes
Equipment
- Plastic wrap
- Parchment paper
- Baking sheet
- Food chopper
- Rolling Pin
- Mixing bowls
- Measuring spoons
Ingredients
Crust
- 2 cups (250 g) all-purpose flour
- 1 tablespoon (12 g) granulated sugar
- 1 teaspoon (6 g) salt
- 12 tablespoons (168 g) unsalted butter cut into tablespoons and freeze for 20 minutes
- 5-7 tablespoons (74-103 ml) ice water
Strawberry Rhubarb Filling
- 2 cups strawberries diced, fresh or frozen* (not thawed)
- 2 cups rhubarb diced, fresh or frozen (not thawed)
- ½ cup (100 g) light brown sugar packed
- 2 tablespoons (25 g) granulated sugar
- 1 tablespoon lemon juice
- 2 tablespoons (16 g) corn starch
Optional egg wash + sugar
- 1 large egg yolk
- 1 teaspoon water
- ¼ cup turbinado or demerara sugar
Instructions
Dough (follow if using a food chopper)
- Add the flour, sugar, and salt to a food chopper. Pulse for 5 seconds. Add the cold butter and pulse until it's blended really well (no large butter chunks are left).
- Add up to 4 tablespoons of ice water, pulsing after each tablespoon. Then, add ½ tablespoon of water at a time until the dough begins to stick together.
- Place the dough onto a sheet of plastic wrap. Form it into a ball and flatten it. Then, wrap it in the plastic wrap and place in the freezer for 1 hour.
Dough (follow if making by hand)
- Whisk the flour, sugar, and salt together in a large bowl. Cut the cold butter into the flour mixture using a pastry cutter or fork. Make sure the butter is coated well with sugar and there are no large chunks.
- Add up to 4 tablespoons of ice water, mixing with a spatula after each tablespoon. Then, add ½ tablespoon of water at a time, stirring until the dough begins to stick together.
- Form a ball with the dough and flatten it on a sheet of plastic wrap. Then, wrap it up and place in the freezer for 1 hour.
Strawberry Rhubarb Filling
- Mix the strawberries, rhubarb, brown sugar, sugar, lemon juice, and corn starch in a medium-large bowl until well combined. Refrigerate until your crust is rolled out.
Assembling the Galettes
- Cut the chilled dough into 4 equal pieces. Work with 1 piece at a time while the others chill in the refrigerator.
- Form a ball with the dough and then flatten it on a sheet of parchment paper. Place another sheet of parchment paper on top of it, and then use a rolling pin to roll it out to a circle 8 inches in diameter.(It helps to tape the bottom parchment sheet to the counter. The sheet on top is to prevent the pin from sticking to the dough.)
- Spoon strawberry rhubarb filling onto the center of the dough (try to leave the juice behind in the bowl). Leave 1 inch of the dough unfilled around the edge.
- Tightly fold the unfilled dough edges onto the filling. The galette should be about 6 inches in diameter.
- Trim any excess parchment paper around the galette and then transfer it onto a sheet pan. (Keep the parchment under it.) Place it in the freezer.
- Repeat with the remaining 3 dough balls, placing each galette onto the pan in the freezer when you're done. All 4 should fit on a half sheet baking pan.
- After all galettes have been assembled and placed in the freezer, preheat the oven to 375°F.
- When your oven is pre-heated and the galettes have been in the freezer for at least 20 minutes, brush them with an egg wash (the yolk mixed with water) and sprinkle turbinado sugar around the edges.
- Bake on the middle shelf until the crust is golden and the filling is bubbling.The time will vary depending on how long they were frozen for. Start checking them around 15-20 minutes. They may take up to 40 minutes to bake.
Comments
No Comments